• About the Author
  • Recipe Index
  • Contact Me
  • The Kitchen Crew
  • The Legal Necessities

More Savory, Less Sweet

Adventures in Food - Taste, Explore, Inspire and Share

Farmers Market Treasures – Strawberry Rhubarb Pie and Spring Pea Salad

07/05/2017 by Laura 3 Comments

Wow…4 months since my last post!  I’ll catch you up on the reasons for that, but first I have a couple recipes for you!  Both of these dishes are the result of an over-the-top buying spree at last weeks neighborhood farmers market.  It was my first outing of the season and everything was calling my name!  The perfect weather, the beautiful fruits and vegetables, plenty of cash, and a longing to get back into my kitchen resulted in two very large bags of goodies.  I bought far more then we needed for one week.  With a few things approaching the end of their usefulness, I got busy to ensure none of it would go to waste!  The results were a fantastic Strawberry-Rhubarb pie and an over the top “spring on a plate” pea salad.

The salad is a result of a Google search based on the unused veggies I had bought…shelling peas, pea pods, and ramps.  I had asparagus on hand, as I always have asparagus on hand until it disappears from the market or becomes ridiculously expensive.  I found this recipe on the Serious Eats website.  I made just a couple alterations, and it was fantastic.  I felt like it was something that would be a first course in a fancy French restaurant… ooh la la!

For the Vinaigrette:

6 tablespoons extra-virgin olive oil

2 tablespoons juice from 1 or 2 lemons

2 tablespoons finely minced fresh parsley leaves

1 small shallot, minced (about 1 tablespoon)

1 teaspoon Dijon mustard (my addition)

Kosher salt and freshly ground black pepper

Whisk the ingredients together and set aside.  I always make my dressing in a measuring cup to make it easy to pour.

For the Salad

1 cup fresh shelled English peas

2 cups fresh sugar snap peas, strings removed, ends trimmed, cut into 1/2-inch pieces on the bias

1 pound asparagus, stalks trimmed, tips removed, tips and stalks reserved separately

2 to 3 tablespoons extra-virgin olive oil

8 to 12 whole ramps, ends trimmed and cleaned

1 large very fresh egg, per serving

2 tablespoons distilled white vinegar

Place a pot of water on the stove.  Salt heavily.  Bring to a slow simmer.  Blanch the shelled peas, then the snap peas and then the asparagus tips, about 1 minute, until bright green.  Remove with a slotted spoon.  Dip in an ice water bath. Place each vegetable in a small bowl and pop in the fridge.

Blanch the asparagus stalks until tender and place in a blender cup with a couple tablespoons of the blanching water and 2 Tablespoons of olive oil. Puree until smooth.  Set aside.

Meanwhile, prepare the ramps.  Heat a tablespoon of olive oil in a heavy sauté pan.  Saute the ramps until tender.  Place on a paper towel line plate.  Set aside.

When ready to assemble the salads, bring the pot of water back to a slow simmer.  Add 3 tablespoons white vinegar.

Combine the peas and asparagus in a bowl.  Add the dressing and toss gently.

Make your poached eggs, one per serving.  Place a couple tablespoons of the asparagus puree on each serving plate.  Top with the pea and asparagus salad mixture.  Place the poached egg on top.  Season with salt and pepper.  Serve immediately! 


Ok, now for the pie!  Strawberry – Rhubarb.  Not typically my first choice, when I think of a pie I want to eat / make.   I honestly have a problem with most fruit pies as they always turn out to be thin, watery, runny, too sweet, too sour, fall apart messes on a plate.  I decided to try a different approach this time.  I roasted the fruit first.  This allowed me to taste the fruit and adjust the sweetness, as well as remove some of the extra juice, prior to filling the pie shell.  I will be using this technique for all future fruit pies.

For the Strawberry – Rhubarb Pie

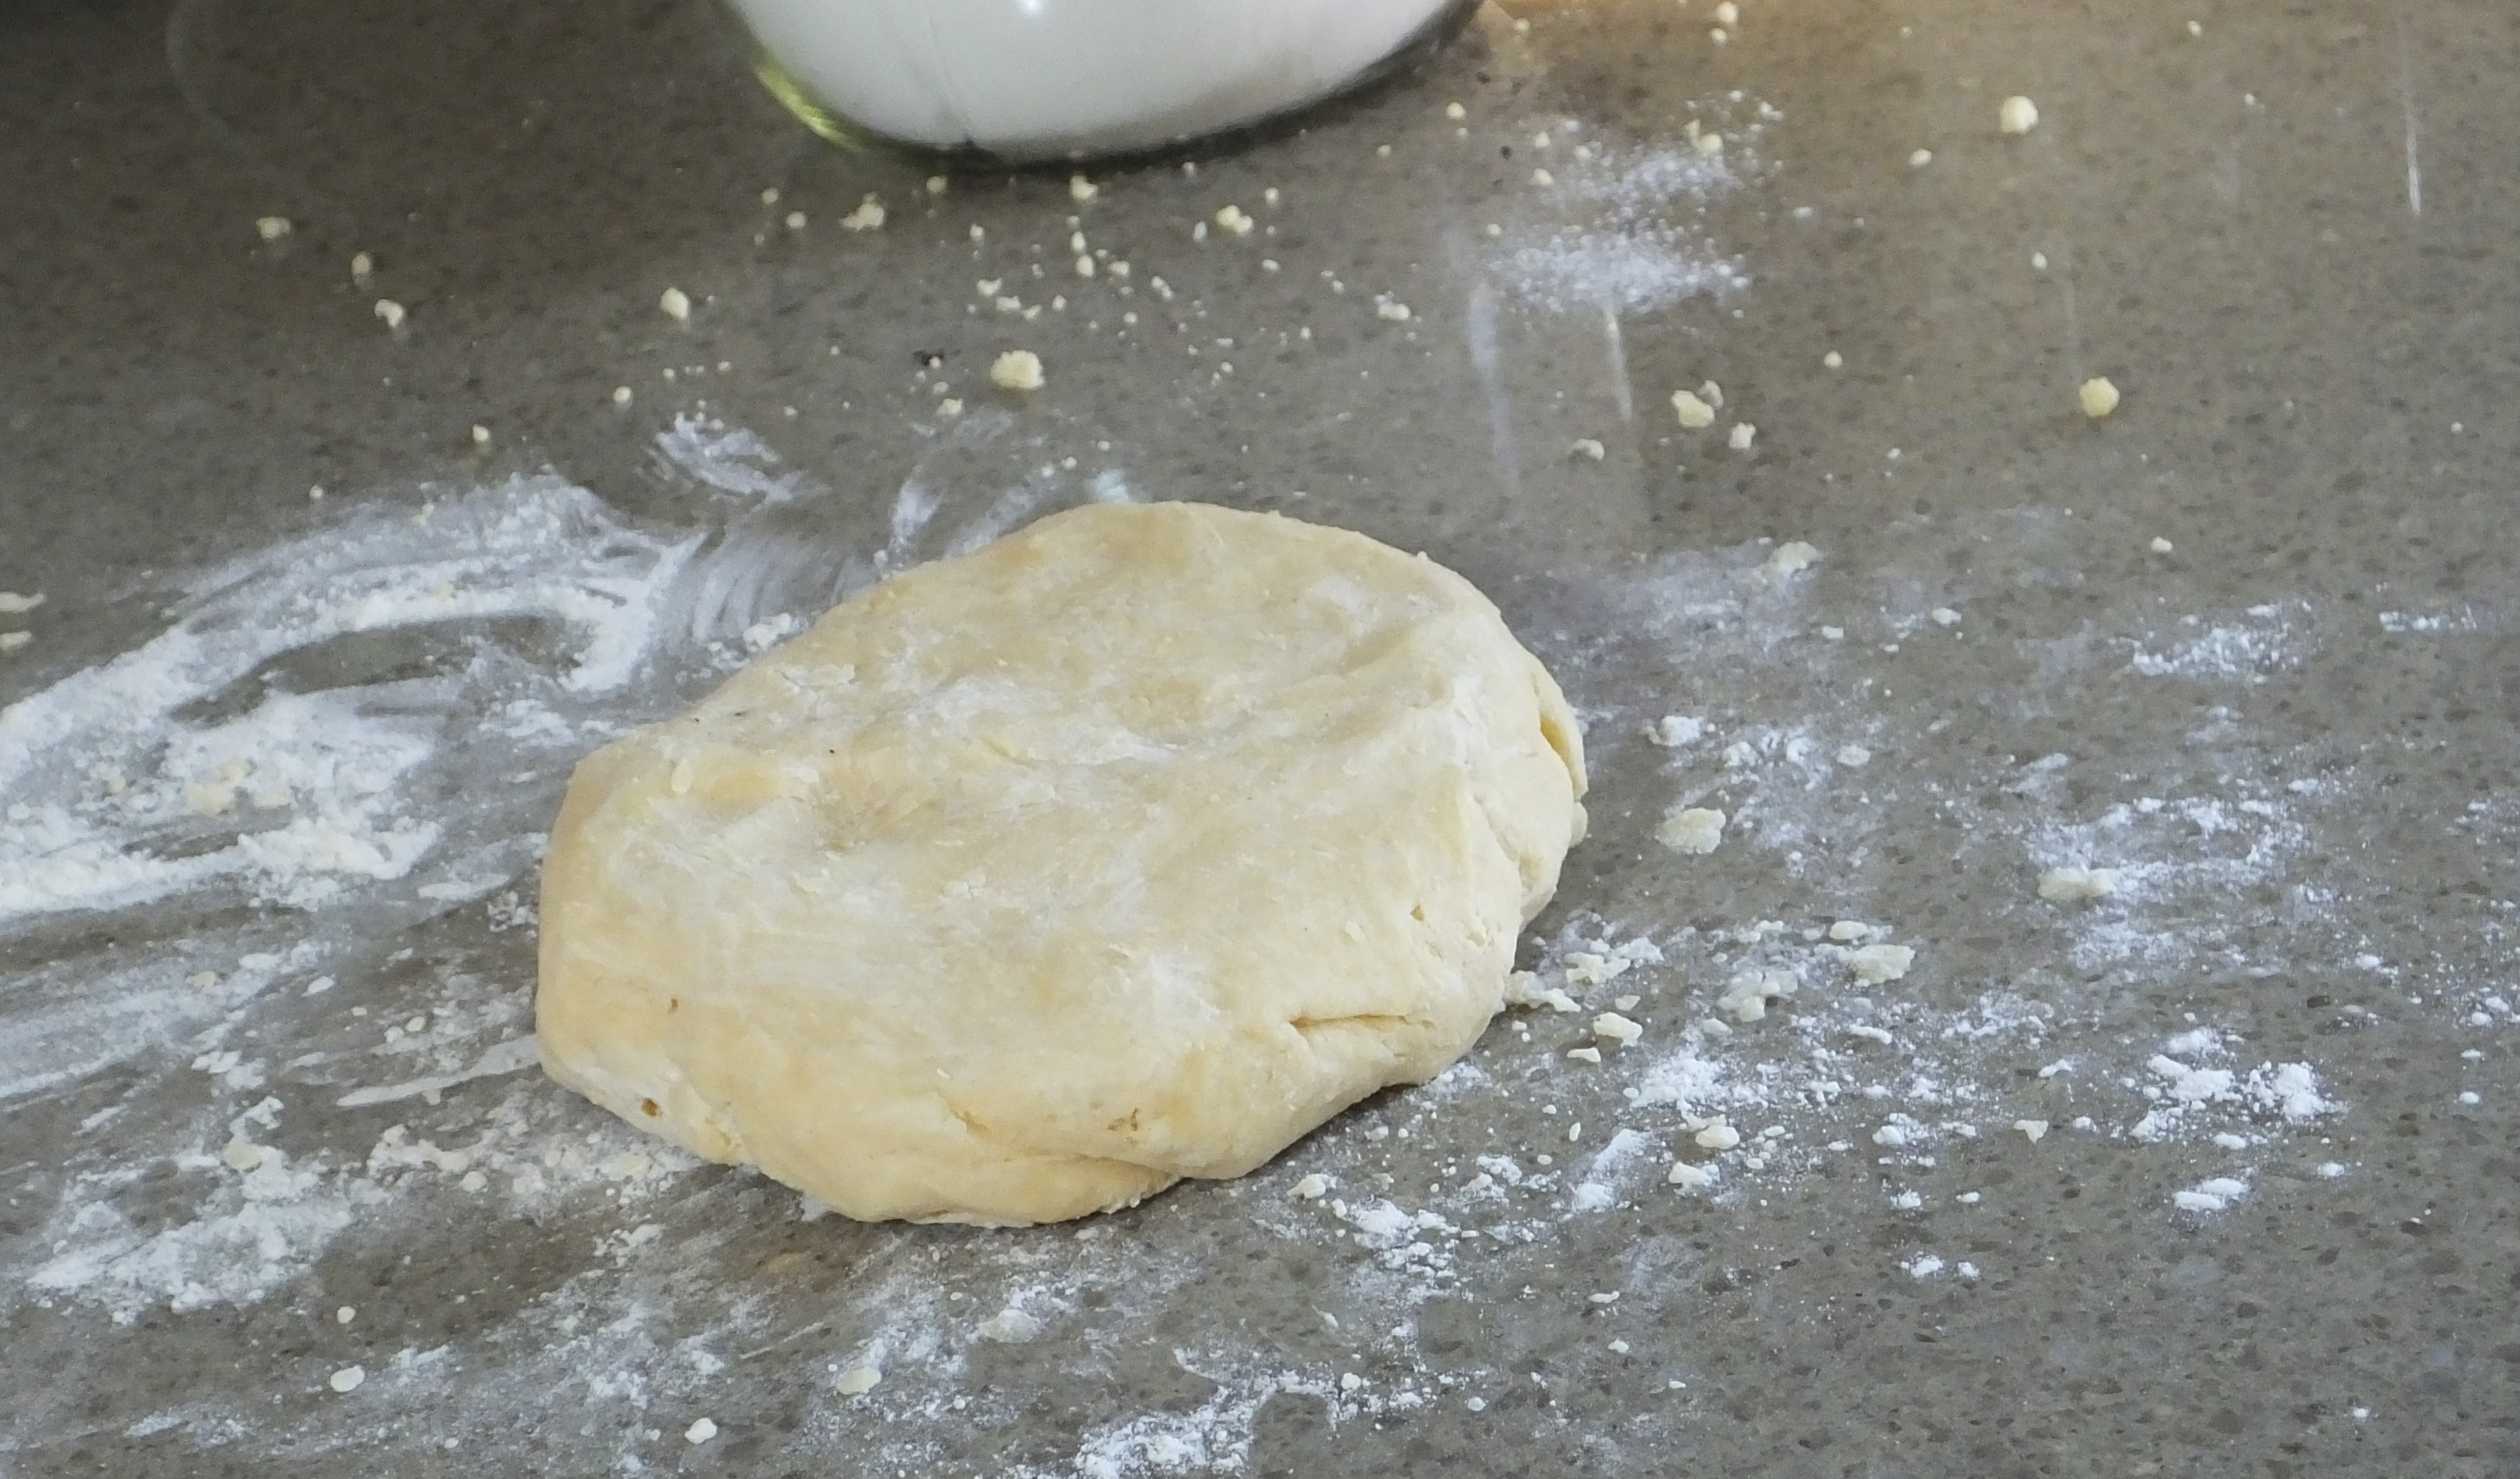
Prepare pie crust for 2 crust pie – make your favorite or check mine out here.

4-5 cups fresh, ripe, strawberries – green part removed – sliced in half if they are large

4-5 cups fresh rhubarb, chopped into small, bite size pieces

3/4 cup of sugar

Place the fruit on a sheet pan, sprinkle with the sugar and roast at 375′ for about 20 minutes.

Remove the pan from the oven.  Let rest about 10 minutes.  Adjust the sweetness to taste.  Add:

4 Tablespoons of flour

2 Tablespoons of quick cook tapioca

1/2 teaspoon of cinnamon

finely grated zest of one lemon

juice of one lemon – about 2 tablespoons

Mix all ingredients together in the roasting pan.  Spoon into piecrust with a slotted spoon.

Place the top crust on the pie.  Pinch the edges and cut steam vents.  Place on a sheet pan.  Place a foil collar around the edges of the pan.  Bake at 425′ for 15 minutes.  Reduce the heat to 375′, remove the foil, and bake 30 more minutes.  Let pie cool at least 2 hours before serving. You definitely want to serve this with vanilla ice-cream!  Enjoy!

Ok – on to the updates…In my last post, I mentioned I retired.  What that has meant for me is working harder then I ever have, without a pay check every other Friday. LOL!!!  I have been away from home, more then I have been at home, these past few months.  Thankfully, it’s not that much different for Dave, then when I was working full time! He’s always been spectacular at fending for himself and holding down the fort.

The work began when my Mom bought a new house.  She no longer needed stairs, 3000 square feet and a quarter acre yard!   She bought the new house last fall, but we really didn’t get busy moving her to her new place until April.  Mom updated 80% of her new place, which took a lot of time, decisions and work.  Dave and I helped out by repairing decks and fences, and assembling cabinets and other things.  Her new home has turned out to be a wonderful place for her.

Her move left us with the BIG job.  Emptying and selling her old house.  We  spent the past few months sorting, packing, selling, donating, dumping, laughing, crying, screaming, and yelling our way through about 25 years of stuff!  For those of you that have been through this, you know what I’m talking about!  For those of you that have not…my advice would be to START NOW!  I am so thankful I was able to go through family things WITH my Mom.  I know what all the stuff is, who the people in the pictures are and what mattered to she and my Dad.  I am still selling things on Ebay and I have a lot of pictures to scan, but the hard work is behind us.  I am happy to say that her house sold in 8 days.  She has a few things planned for fall, and none of those plans include yard sales or moving! For those of you that don’t know, my Mom is 88 years old!  She is absolutely amazing.  We worked side by side, hours on end, with her frequently ordering me to “sit down and rest”.  We should all be so healthy and spunky!

With Mom’s big project behind me, I can start to sort out what retirement really does mean for me.  You can see from the above, I am really happy to be able to wrap my head around cooking and photography again.  Dave and I are taking our own advice of “starting now” on sorting, selling things and downsizing.  Bit by bit, we are getting rid of the unnecessary things we’ve accumulated…just because we could!  It’s amazing to me how quickly stuff accumulates, and how little of it we really “need”.

It’s been great catching up. Thanks for stopping by!  Enjoy the food and have a wonderful evening.

Laura

Filed Under: Appetizers, Baking, Dessert, Vegetables, Vegetarian Tagged With: appetizer, asparagus, dessert, egg, farmersmarket, pea pods, peas, pie, ramps, Rhubarb, strawberries

Calling all lovebirds…a special meal for Valentine’s Day

02/04/2017 by Laura Leave a Comment

I previously mentioned we are trying to create a little excitement at dinner time this year.  One way we are doing this is to randomly grab a cookbook, open it and make whatever is on that page!  I have to say, this “experiment” is working out very well!  While I did not make all three recipes below on the same day, I do think they would make an inspired meal for your sweetheart on Valentine’s Day, or any other “show the love” day for that matter.

This post is a little different, as I am going to just “refer” you to the recipes.  I am endorsing all of them as truly inspired and delicious, and I hope you will give them a try.  I have provided you links to the books and the specific recipes.  The photos are from the dishes I prepared for Dave and I.  I am privileged to own a copy of all the books referenced.

The Chocolate Orange Beet Cake with Cream Cheese Walnut Frosting,  is absolutely delicious.  It is from Vivian Howard’s new cookbook, Deep Run Roots and was also featured on her PBS series A Chef’s Life. The book is heavy on southern, seasonal produce.  I cannot wait to cook from it this summer, when the fresh ingredients are readily available at the farmers market.  I made only 2 changes to the recipe.  I used two 9″ layer pans, rather than 3 8″ layer pans.  I also frosted the entire cake, sides and top.  It all worked out perfectly.

My next “open the book and cook” recipe is from Top Chef Master, Floyd Cardoz.  His new book Flavorwalla is filled with recipes inspired by what he cooks at home, what he grew up with and a few from the menus of his restaurants.  The Grilled Shrimp with Fennel and Radish Salad, is something that he served at Tabla.  It makes a wonderful first course, or a light meal.  It  gave me the chance to use my mandolin!  It’s a must for slicing the fennel and radishes perfectly thin.

I seem to be going backwards with the courses.  But hey, you can certainly start with chocolate cake if you want to….with a little ‘bubbly, and come back later  for the rest of the meal!

The main course is also from Flavorwalla!  This one was not a random recipe, but one I chose due to a craving for fresh, seared scallops.  It’s quite an unusual take on traditional pan seared scallops, with the Cider Glaze over the top and the Cumin Scented Cauliflower Puree underneath.  It all works!  It’s an amazingly flavorful dish.  Here is the link for Cider-Glazed  Seared Scallops with Cauliflower Puree.  I especially love the addition of cumin, ginger and shallot to the cauliflower puree.  It adds a wonderful depth of flavor and you will not miss the cream or butter at all!

So there ya go….Valentine’s or any other special occasion meal, all laid out for you.  All you have to do is shop and cook, pour the bubbly and light the candles.

Thanks for stopping by.  I hope you have a wonderful evening!

Laura

A few production photos….just for fun!


Filed Under: Appetizers, Baking, Dessert, Fish and Seafood, Holiday, Memorable Events, Salads Tagged With: beets, cauliflowers, chocolate, cider, cream cheese, fennel, orange, pureed, scallops, shrimp

Game Time Spicy Miso Chicken Wings

01/22/2017 by Laura Leave a Comment

All geared up for a Seahawks win last Saturday, I made some extra special snacks for the game.  I love tradional Buffalo Wings, but I really wanted to try something new.  Flipping through Sara Moulton’s Home Cooking 101, I found a Japanese twist on the traditional little drummers.  Hiroko Shimbo shared her recipe from her book Hiroko’s American Kitchen, Cooking with Japanese Flavors for these wings, which are adapted slightly by Sara.  Dave had requested Egg Rolls as well, and the two dishes went together perfectly.  Let’s just say, the snacks were way better then the game.  Next year ‘Hawks!

For the Spicy Miso Sauce

1 cup aged brown or red miso

1/2 cup plus 1 tablespoon of sugar

3/4 cup mirin

1/3 cup sake

1/4 cup fresh lemon juice

2 teaspoons red pepper flakes

Prepare the miso sauce:  Place the miso, sugar, mirin and sake in a medium pot, and whisk until smooth.  Place the pot over medium heat and bring to a simmer.   Cook the mixture about 5 minutes, while stirring constantly.  Add the lemon juice, reduce the heat and let cook another 8-10 minutes.  Add the red pepper flakes and stir.  Keep sauce warm, on the lowest heat possible, while you prepare the wings.  You will have extra sauce, which is also great on grilled steak!

For the Chicken Wings

1 1/2 pounds chicken wings

2 teaspoons onion powder

1 teaspoon sea salt

1 egg, lightly beaten

1 tablespoon sake

6 tablespoons cornstarch

1/4 cup all purpose flour

2 tablespoons of ginger juice, from a 5 inch knob of freshly grated ginger, divided into 2 – 1 tablespoon portions

(Peel and grate the ginger on a microplane.  Place the ginger in a garlic press to squeeze out the juice.)

1/2 – 3/4 cup Spicy Miso Sauce,  from recipe above

2 teaspoons rice vinegar

1 teaspoon soy sauce

2 teaspoons hot paprika

1 scallion, sliced thinly, green part only

Vegetable oil for frying

Prepare the wings:  Remove the wing tips and cut the remaining wings into 2 pieces at the joint.  Combine the onion powder, salt, egg, sake, cornstarch and flour and 1 tablespoon of the ginger juice in a large bowl.   Add the wings, mix thoroughly to make sure they are evenly coated.

Heat 3 inches of oil in a heavy skillet to 330 degrees.  Fry the wings in small batches, about 6 minutes, turning from time to time.  Remove to a cooling rack placed over a pan, to allow the oil to drain.

Prepare the sauce to coat the wings.  In a small bowl, combine the warm Spicy Miso Sauce, rice vinegar, soy sauce, and paprika.

Heat the oil in the skillet to 350 degrees.  Refry the wings, to ensure crispiness and that they are thoroughly cooked through, about 3-4 minutes.  Drain on rack.  When all wings have been fried the second time, place them in a bowl and pour the sauce over them, stir to ensure they are evenly coated.  Plate the wings and garnish with the sliced scallion.  Serve, with lots of napkins!

I hope you try this recipe, next time you’ve got a craving for wings.

Thanks for stopping by.  Have a great evening.

Laura

Filed Under: Appetizers, Poultry Tagged With: appetizer, game time, miso, spicy, wings

More from IFBC – An Awesome Turkey Burger and Getting the Shot, Regardless of the Light!

10/08/2014 by Laura Leave a Comment

One of my favorite presentations at IFBC was Todd Coleman’s.  Todd is the Creative Director at Tasting Table and former executive food editor of Saveur magazine.  Todd is a bit of a rebel, which is probably why I liked him so much!  You know the type, go for it and beg for forgiveness later, but only if absolutely necessary.  One of my bosses used that exact phase to describe both my strengths and weaknesses when asked for a pre-employment personal reference.  Todd hasn’t really followed a traditional career path.  I am not sure he even had a specific goal in mind when he entered the CIA.  One thing is for sure, he has explored, touched, and mastered every aspect of food related creativity! Though he did not speak to it, I sensed a willingness to take risks, a strong sense of confidence and an innate ability to listen to your gut, without letting the “I can’t, I shouldn’t, what if, or but” get in the way!  Though it may get you in a whole lot of trouble when you are younger, once that fearless determination is coupled with a little experience and knowledge – look out!  Todd’s amazing career, as an editor, chef, producer, photographer, videographer and who knows what next is just such an example of someone who refused to follow the rules and created a few of his own along the way!

I’ve had a few photography classes, but I am still very much a beginner.  Every class I’ve had has stressed the importance of natural light.  So, imagine my shock (and delight) when Todd pulled a flashlight and a piece of foil out of his pocket!  iPhone photo in a dark restaurant?  No problem!  Place the foil opposite the object and bounce the flashlight light off the foil!  While this is an extremely simplified summary of his point, it’s still pretty accurate.  My purse just got 10 pounds lighter and my restaurant companions just let out a big sigh of relief.

Todd Cleman at IFBC

Todd presented many photos from his portfolio as well as a recent video filmed for Tasting Table.  I did not take any photos during his presentation as I was engrossed in watching, listening and learning.  He has a style all his own. Check his work out at Todd Coleman Photography.  You will recognize many of the photos!  A lot of the photos included in his presentation were taken at night with artificial light.  This was really thrilling to me as I have been dreading the quickly approaching dark Seattle winter days.  For plated food shots, Todd suggested dropping lights down to the level of the food, rather then lighting from above.  I tried it with this burger.  What do you think?  Can you tell this was taken at 8pm with artificial light?

BBQ Turkey Burger

The turkey burger was inspired by the BBQ Turkey Sliders served at the Butterball presentation at the IFBC conference.  The sliders make a great party appetizer and will probably make an appearance at our house on Super Bowl Sunday or New Year’s Eve!  It took me a while to convince Dave to try a turkey burger and much to his surprise, he really liked it!

For the Turkey Burger

1 pound ground turkey, we used organic ground turkey

1 egg

1/2 cup panko breadcrumbs

1/4 cup bbq sauce (plus 1/4 cup more for basting), we really like Organicville – no sugar or corn syrup

lettuce leaves

sliced tomatoes

sliced cheese, we used organic white cheddar

bbq buns for burgers, or King’s Hawaiian Rolls, split, for sliders

Place the ingredients in a bowl and mix well.  Form the mixture into 12 small patties if making sliders, or 3-4 patties if making burgers.

turkey burgers 010.1  turkey burgers 018.1 turkey burgers 026.2

Warm a grill pan or skillet over medium heat.  Oil the skillet to prevent sticking.  Cook the burgers until lightly browned on one side, flip, baste with bbq sauce.  Repeat.  Complete cooking until temperature on a meat thermometer reaches 165′ – the temperature required for thoroughly cooked poultry.  Place a slice of cheese on each patty.  While the meat rests, lightly toast the buns.  To assemble, place a lettuce leaf on the bun, sliced tomatoes, and then the turkey patty. Enjoy!

Have a wonderful evening,

Laura


Filed Under: Appetizers, BBQ, Poultry, Quick - Week Night

Salmon Nicoise and Heirloom Tomato Bruschetta

08/09/2014 by Laura Leave a Comment

I knew I was kind of pushing my luck serving salmon two days in a row.  Dave informed me that it is not much of a “hard-working man’s meal”.   By hard-working, he means painting the second of four sides of the house.  I think he was too hot and tired to protest.  I did surprise him by making a beautiful plate of our favorite heirloom tomato bruschetta.  We finally have tomatoes and basil all ripe together. If you are not growing your own tomatoes, you must splurge; at least once this summer, on a few from the farmers market and make this dish.  A little fresh mozzarella and prosciutto make this a meal on its own!

bruschetta and niciose 026

Though Salad Nicoise is traditionally made with tuna, I often see it made with salmon as I have done here.  Maybe it is a Pacific Northwest thing.  Regardless, it is becoming my favorite preparation!  And since it’s summer and we are having a French salad, I had to serve it with a lovely, dry rose!  Someone needs to inform the folks who stock the wine in the cooler that people drink chilled rose in the summer.  There were numerous choices on the shelf, and none in the cooler!  Doesn’t it look beautiful with the salmon?

bruschetta and niciose 030.2

for the Salad Nicoise

for the dressing

Dijon Vinaigrette – not traditional – but my version!

2/3 cup of great quality olive oil

1/4 cup sherry wine vinegar

1 teaspoon Dijon mustard

1/2 teaspoon tarragon

Fresh cracked pepper and salt to taste.

Whisk all together in a small bowl or measuring cup.

for the salad

4-6 small baby new potatoes, boiled gently until fork tender, drained and cooled

1/2 pound haricot vert – or any other small green bean, blanched until tender and cooled

2-4 hard-boiled eggs

a handful of heirloom cherry tomatoes

mixed baby lettuce

Nicoise olives (I could not find these at my regular store.  I substituted the Lucques olives I had on hand.  At least they were French!)

4 ounce portion of grilled salmon or one can of good quality tuna packed in olive oil, per serving

capers for garnish

fresh ground pepper and salt

Slice the cooled potatoes, place in a small bowl and pour a little of the dressing over them. Garnish with a small spoonful of capers.   Stir gently to coat.  Place the green beans in a small bowl and dress them in the same fashion.  Slice the tomatoes, peel the eggs and chill until ready to plate.

bruschetta and niciose 018.2

To assemble the salad, place a handful of the baby lettuce on a chilled dinner plate.  Sprinkle with a little of the salad dressing.  Arrange the sliced potatoes, green beans, eggs, tomatoes, salmon or tuna, and olives in a pleasing pattern.  Spoon a little more dressing over the salad.  Bon appetite!

to prepare the Bruschetta

fresh baguette bread, sliced on the diagonal

olive oil

salt and pepper

chopped heirloom tomatoes, about 1 cup

finely minced garlic, 4-5 cloves

1/4 cup basil chiffonade

Brush the sliced baguette bread with olive oil.  Season with salt and pepper.  Toast until the edges brown.

Mix the diced tomatoes, minced garlic and basil together in a small bowl.  Add a little olive oil to coat the tomatoes.  Stir gently.

Spoon the tomato basil mixture onto the toasted bread.  Garnish with a little more basil.

bruschetta and niciose 010.2


Filed Under: Appetizers, Fish and Seafood, Quick - Week Night, Salads Tagged With: basil, bruschetta, french, heirloom, nicoise, rose, salad, salmon, tomato

First Day of Summer!

06/22/2014 by Laura Leave a Comment

Yesterday was the first day of summer; the longest and most wonderful day of the year.  The solstice begins a series of long days!  Since we are so far north it can remain light up to 10:30pm.  We were charmed by perfect weather, not always the case on June 21st in Seattle!  We worked in the yard most of the day; weeding, trimming, mowing, sweeping.  Feeling inspired and motivated, we tore into our garden shed.  The shed was in total disarray and begging for reorganization.  By disarray, I mean knowing you have string for the weed whacker,  a washer for the sprinkler, twine for the tomatoes; but cannot find any of it!  With hooks replaced, tools rehung, gloves, hand tools, washers, sprinklers and clippers all sorted and placed in bins the shed has returned to a state of organized usefulness!  We pinky swore we would keep it that way!  Rewarding ourselves, we relaxed on the patio for a couple of hours; listening to music and drinking in the beauty of the day.

yard 004.2

It was (all too) soon time for dinner.  Armed with my bounty from the farmers market and a piece of Copper River Salmon, dinner was quick and easy.   I knew I wanted to use my peas, fava beans, and garlic scapes, somehow.  Catching up on my favorite blogs in the afternoon, I came across a dish posted by Aran Goyoaga at  Canelle et Vanille: Fava and Peas with Prosciutto and Fried Egg.    Not really a salad and not really a vegetable, it was more of a first course.  The dish was exactly what I was looking for.  I modified the recipe to include tiny, new potatoes.  The dish would be a wonderful meal on its own, and was also perfect with the grilled salmon.

salmon fava beans 013.2

I prepped the peas and the fava beans the day before.  If you have never worked with fava beans, there are a couple of steps.  First, remove the beans from their velvety outer jacket.

Next, blanch the beans for about 30 seconds in a pot of boiling water, and immediately place in ice water.  This makes it easier to remove the white, outer shell from the bean.  Remove the outer layer and set aside.

Fava Beans


Shell the peas and set aside.  Can you tell Dave shelled and photographed the peas?

cahir, tv stand, fava beans 028.2


For the Fava and Peas with Potato, Prosciutto and Fried Egg

Adapted from the original recipe Canelle et Vanille: Fava and Peas with Prosciutto and Fried Egg. 

About 1 pound of Fava Beans, shelled, blanched and peeled

About 1 pound of English peas, shelled

4-6 tiny, new potatoes (not in original recipe)

3 tablespoons of olive oil, plus additional for frying the eggs

1 small leek, cleaned and sliced, white parts only

5-6 garlic scapes, or 2 finely sliced garlic cloves if you do not have scapes

4 slices prosciutto or Serrrano

2 eggs

1 cup watercress, – I had arugula which I used instead

Chopped mixed herbs, I used parsley and tarragon

Bring a pot of salted water to a boil.  Blanch the fava beans and peas about 2 minutes.  Remove and drain in a colander.

Add the potatoes to the boiling water and cook until a sharp knife can easily be inserted, about 10 minutes.  Drain and slice in half.

Heat 3 tablespoons of olive oil in a sauté pan.  Sauté the leeks and scapes (or garlic) until soft, but not brown.  Add the fava, peas and potatoes.  Season with salt and pepper. Sauté to warm through and to ensure all vegetables are coated with the oil.   Set aside and prepare two fried eggs.

salmon fava beans 001.2

When ready to plate, place the vegetables on a plate of arugula (or watercress).  Top with the prosciutto and fried eggs.  Garnish with the chopped herbs.  I also added some sliced radishes at this stage.

salmon fava beans 006.2

A perfect summer meal and a perfect summer day.   Cheers to many more!


Filed Under: Appetizers, Fish and Seafood, Quick - Week Night, Salads, Vegetables Tagged With: Fava, peas, prosciutto, solstice, summer

South Beach Diet Thai Style Turkey Meatball Lettuce Wraps

01/17/2014 by Laura Leave a Comment

I have made these 3 times so far….each time getting a little better!  I am finally happy with this version.  I first saw the recipe when it was delivered to my mailbox from Kaylyn’s Kitchen, http://www.kalynskitchen.com/.  Kaylyn has fabulous low-carb, South Beach Diet recipes.  I have changed up the recipe to suit our taste, and to increase the fiber by adding flax meal.  I also prefer to bake them, rather than fry them, as they are very soft.  I hope you enjoy them as much as we have!

Thai Style Turkey Meatballs161

For the Meatballs

2 pounds lean ground turkey

1 Tablespoon finely minced garlic

1 red bell pepper, finely chopped

1 jalapeno, finely minced

2 Tablespoons fresh grated ginger root

2 Tablespoons sesame oil

2 Tablespoons rice vinegar

1 Tablespoon of soy sauce

1 egg, beaten

2/3 cup ground flax meal

Combine all the ingredients above in a large mixing bowl.  Mix well.  If time permits, chill for 20-30 minutes.

Thai style turkey meatballs

Scoop the meatballs into 1 inch balls.  Place on a baking sheet that has been sprayed with cooking oil.  Bake 20 minutes at 350′,  making sure internal temperature of meatballs is 160′.

thai style turkey meatballs

For the Dipping Sauce

1/3 cup of Fish Sauce

1/3 cup of rice vinegar

2 Tablespoons of sesame oil

1 teaspoon crushed red pepper flakes

2 Tablespoons of soy sauce

Mix all together, set aside until ready to use.

pork roast and asian meatballs 154

For the Lettuce Wraps and Garnishes

1-2 heads of Butter Lettuce, washed and leaves separated

1 cucumber, seeded and sliced

1 bunch of green onions, sliced

1 bunch of mint, chopped

1 bunch of cilantro, chopped

1 lime, cut into wedges

To Serve

Place one to two meatballs in a leaf of lettuce.  Garnish with cucumber, mint, cilantro, and onion.  Add a couple spoonful’s of dipping sauce.  Roll up like a burrito.  Enjoy!

Filed Under: Appetizers, Poultry, Quick - Week Night Tagged With: lettuce, low carb, south beach diet, turkey

Phở Bò and Fresh Spring Rolls

11/05/2013 by Laura Leave a Comment

Just being back from Hawaii; FREEZING inside and out, I decided a big pot of hot, steamy noodles was needed.  This was my first attempt at Phở Bò – Vietnamese Beef Noodles.  Yes, there is a Pho restaurant about every third block, here in Seattle, but I wanted to make my own.  The simmering broth filled the house with the most amazing aroma, as the spice combination is not something we have used before.  I will make this again and freeze the broth to construct a quick meal!

Pho and Spring Rolls 166.2

The ingredients are pretty basic and should be available at a well stocked super-market.  I am fortunate to have a lovely Asian market nearby.  It is well staffed with knowledgeable folks who have helped me decipher the labels many times.  Amazon.com is also a great resource, should you not be able to find the ingredients at your market.

The spring rolls were a last-minute addition, and a great accompaniment!  I took a Thai cooking class a few years ago, and have been making the spring rolls ever since.  Writing about them forced me to actually measure the ingredients for the dipping sauce.  When the instructor demonstrated this, it was “a little of this and a little of that”.  It does take some practice to make a tight roll, but it is worth the effort!

For the Spring Rolls

It is difficult to provide exact amounts, as it is all dependent on the number of rolls you intend to make!

Spring Roll Rice Paper wrappers – 1 per roll

Fresh Mint leaves – 2 to 3 per roll

Fresh Thai Basil leaves – 2 to 3 per roll

Julienned Daikon Radish  – approximately 1 Tablespoon per roll

(Marinate in a small glass dish with 1/4 cup rice wine vinegar and 1/2 teaspoon of sugar)

Julienned Carrot – approximately 1 Tablespoon per roll

Bean thread noodles – Saifun – approximately 1 Tablespoon per roll

Shrimp – I use 51/60 – cooked, deveined, peeled and tails removed – about 4 per roll

Leaf lettuce – I like butter lettuce, easy to roll – 1 per roll

Dip the rice paper sheet in a bowl of warm water to soften – just until the lines disappear. Lay the paper on a plate or cutting board.  Lay the shrimp on the paper followed by the lettuce leaf, the noodles, carrot, daikon, basil and mint.  Roll tightly, like a burrito, folding the ends over about half way through and then complete the roll.  Below is a video showing how to make the rolls.

For the Dipping Sauce

2-3 Cloves of garlic, peeled and sliced

1-2 Thai chilies, seeds removed and sliced

1″ piece of ginger root, peeled and sliced

Pho and Spring Rolls 148.2

1 cup Hoisin Sauce

1/2 cup Oyster Sauce

1 teaspoon date palm sugar

1 teaspoon white vinegar

1/4 cup of Sprite

Chopped Peanuts if desired, a couple of tablespoons

Place the garlic, ginger, sugar, chilies and vinegar in a blender.  Process until smooth. Add the Hoison  and Oyster sauce. Blend again.  Add the Sprite, blend and taste for seasoning.  This is one of those things you need to adjust to your taste.  Want it hotter – add more chilies, sweeter – more sugar, etc… The sauce will keep in the refrigerator for about a week and gets better after it chills awhile.

To serve, cut the rolls on the diagonal.  Place the sauce in individual bowls for dipping.  Add chopped peanuts if desired.

For the Phở Bò

Since I had not made this before, I looked through a few cookbooks and recipes on the internet.  I decided on the great recipe form Jaden Hair’s blog, Steamy Kitchen, www.steamykitchen.com.

For the broth

2 onions, halved

6″ nub of ginger, halved lengthwise

5-6 lbs of good beef marrow bones

6 quarts of water

Spice bag – 1 cinnamon stick, 1 Tablespoon coriander seeds, 1 Tablespoon fennel seeds, 5 whole star anise, 2-3 cardamom pods, 6 whole cloves – all wrapped in cheesecloth and tied.

Pho and Spring Rolls 139.2

1 1/2 tablespoons kosher salt

1/4 cup fish sauce

1 inch chunk of  date palm sugar

To serve

1 16 oz. Package Rice noodles (dried or fresh), cooked according to directions (I used Banh Pho, Flat Rice Noodles)

1/2 lb  sirloin, sliced as thin as possible. (I found thinly pre-sliced sirloin at my market)

big handful of each: mint leaves, cilantro leaves, and Thai basil leaves

2 limes, cut into wedges

2-3 chili peppers, sliced (Fresno or Jalapeno)

2 big handfuls of bean sprouts

Hoisin sauce and Sriracha hot sauce for garnish

Directions:

I roasted the bones in the oven at 375′ for about an hour.  This is not standard in traditional recipes.  I found it very helpful to remove a lot of the fat and intensify the flavor.  I then continued the recipe as written.

Char: Turn your broiler on high and move rack to the highest spot. Place ginger and onions on baking sheet. Brush just a bit of cooking oil on the cut side of each. Broil on high until ginger and onions begin to char. Turn over and continue to char. This should take a total of 10-15 minutes.

Parboil the bones: Fill large pot (12-qt capacity) with cool water. Boil water, and then add the bones, keeping the heat on high. Boil vigorously for 10 minutes. Drain, rinse the bones and rinse out the pot. Refill pot with bones and 6 qts of cool water. Bring to boil over high heat and lower to simmer. Using a ladle or a fine mesh strainer, remove any scum that rises to the top.

Pho and Spring Rolls 141.2

Boil broth: Add ginger, onion, spice bag, sugar, fish sauce, salt and simmer uncovered for 3 hours. Strain broth and return the broth to the pot. Taste broth and adjust seasoning – this is a crucial step. If the broth’s flavor doesn’t quite shine yet, add 2 teaspoons more of fish sauce, large pinch of salt and a small nugget of date palm sugar (or 1 teaspoon of regular sugar). Keep doing this until the broth tastes perfect.

Pho and Spring Rolls 150.2

Prepare noodles & meat: Slice your sirloin as thin as possible – try freezing for 15 minutes prior to slicing to make it easier. Arrange all other ingredients on a platter for the table. Your guests will “assemble” their own bowls. Follow the directions on your package of noodles – there are many different sizes and widths of rice noodles, so make sure you read the directions. For some fresh rice noodles, just a quick 5 second blanch in hot water is all that’s needed.

Ladling: Bring your broth back to a boil. Line up your soup bowls next to the stove. Fill each bowl with rice noodles, raw meat slices. As soon as the broth comes back to a boil, ladle into each bowl. the hot broth will cook your raw beef slices. Serve immediately. Guests can garnish their own bowls as they wish.

My favorite Fish Sauce is Three Crabs Brand

ASH110


My favorite Hoisin is Koon Chun (my shop was out of this brand so I used Panda, which is not quite as thick)

41VF5hzZGVL__SY300_

Filed Under: Appetizers, Soup

Heirloom Tomato, Basil and Buratta Salad

09/07/2013 by Laura 3 Comments

I hesitated posting this, as it is so simple. Then I thought about February in Seattle.  I will want to look at these photos in a few months to remind myself there is hope….the rain will stop, the sun will shine,  the ground will thaw, we will plant a garden, and we will have gorgeous heirloom tomatoes once again.

passport 015

We are to have a few more record-breaking days in the low to mid-eighties this week.  The best summer I can remember in Seattle.  Knowing the tomatoes will soon stop, I decided to treat myself one (hopefully not, but probably so) last time to an heirloom tomato, basil and burrata salad.  It was the perfect chance.  Dave was away at a gig,  and I did not need to prepare a full meal.  Dave does not like burrata nor would he ever consider a tomato salad a meal.  He would probably fall over dead to know we paid $30 for this at Boulevard in San Francisco last summer!  Anyway, spring for the buratta and heirloom tomatoes(if you don’t have them in your garden)….treat yourself, it is worth it!

passport 014

Buratta, Heirloom Tomato and Basil Salad

Heirloom Tomatoes

Basil

Buratta

Fruity Olive Oil

Balsamic Vinegar or Balsamic Glaze

Fresh Ground Salt and Pepper

I arranged my tomatoes and cheese on a pile of wild arugula, which is not visible.  (Also something I love that Dave does not care for!) Garnish with fresh basil, cracked pepper and salt and a drizzle of EVOO and balsamic. ENJOY!

passport 019

Filed Under: Appetizers, Gardening, Quick - Week Night, Salads, Vegetables, Vegetarian Tagged With: arugula, balsamic vinegar, basil, EVOO, heirloom tomatoes

Savory Tomato Tart with Pesto, Mascarpone and Ricotta Filling – and Detailed Pie Crust Instructions

09/04/2013 by Laura 1 Comment

The tomato “situation” continues at our house.  Don’t think I am not grateful for the bounty of fruit this summer!  It is just sad that the season is so short and it happens all at once!  After making 8 quarts of sauce this weekend, I still have about 30 pounds of tomatoes, in varying stages of ripeness.

I searched the internet for a Tomato Tart recipe that would incorporate all the things in my refrigerator that I needed to use up.  Pesto, Mascarpone, Ricotta, Parmesan…. I found variations, but not exactly what I wanted.  Below is the combination I came up with.  It was quite yummy!

tart 139.2

Laura’s Tomato Tart

Prepare the crust

Pie crust preparation has been revolutionized by the food processor!  I only started making crust about 3 years ago.  Up to that point, I used the frozen or refrigerated options.  There were a couple of good reasons:  First, I really did not have a proper counter to roll out dough, until the kitchen remodel in 2010!  Second, I think I inherited “fear of dough” from my Mom.  I will never forget walking in the door from school at about age 10, just in time to hear my Mom let out a word I had not heard her use before, while watching the dough, bowl and rolling-pin go into the garbage can!  I don’t remember what happened after that…. I don’t think there was a pie!  Anyway, if you have a food processor, make the crust from scratch.  It is worth the effort and you know exactly what is in it!  Detailed instructions below.  This is a very easy dough to work with.

(The Crust Recipe is Ina Garten’s, from Barefoot in Paris, 2004)

1 1/2 cups regular flour, plus more for dusting the board

1/2 teaspoon Kosher salt

12 tablespoons cold unsalted butter, divided

3 to 4 tablespoons ice water

Have all your ingredients ready to go. (pic 1) Put the flour and 1/2 teaspoon salt in the bowl of a food processor fitted with the steel blade. Cut 12 tablespoons (1 1/2 sticks) of the butter into large dice, add to the bowl, and (pic 2) pulse until the butter is the size of peas.  With the machine running, add the ice water a tablespoon at a time, and process until the dough becomes crumbly (pic 3). Don’t over process. (pic 4)Dump the dough out on a floured board, (pic 5) gather it loosely into a ball, wrap in plastic wrap and refrigerate for 30 minutes.

tart 002.1

tart 003.1tart 004.1

tart 007.1tart 008.1

Roll the chilled dough on a well-floured surface to desired thickness, and fit it into tart pan. Roll the pin over the top to cut off the excess dough.

(Thanks for the video and music, Dave!)

???????????????????????????????

tart 015

Cut a square of foil to fit into the pan.  Spray with olive oil spray on one side and place, oil side down, into the tart pan.  Fill the foil with beans or pie weights.

tart 038.1 tart 046.1

Bake for 20 minutes. Remove the beans and foil from the tart shell, prick the bottom all over with a fork, and bake for another 10 minutes.

tart 065.1

Prepare the filling

Place all ingredients in a bowl and mix well.  Chill in refrigerator until ready to use.

8 oz. Mascarpone cheese

8 oz. Ricotta cheese

1 cup grated Parmesan

2 eggs

3 Tablespoons Pesto

Salt and Pepper

tart 010

Prepare the tomatoes

Line a baking pan with parchment paper and spray lightly with olive oil spray.  Slice the tomatoes into fairly thick slices and place on the paper.  Season with salt and pepper and roast at 350′ about 15 minutes.  Set aside until ready to top the tart. (Pre-roasting ensures the tart will not get too watery.) Tomato varieties below are Brandywine, Green Zebra and Juane Flamme.

tart 012.1

Assemble the Tart

Pour the prepared cheese mixture into the pre-baked tart shell.  Bake 75% of the way done – about 40 minutes at 350′.  Place the roasted tomatoes on top and return the tart to the oven for another 10 – 15 minutes, until firm.  Serve the tart at room temperature, with a little fresh basil sprinkled on top.

tart 134

Filed Under: Appetizers, Baking, Quick - Week Night, Vegetarian Tagged With: mascarpone cheese, pesto, pie crust, ricotta, tomato

  • 1
  • 2
  • Next Page »

Looking for a particular recipe? Search here!

Stay in touch!

Enter your email address to subscribe to More Savory Less Sweet, and receive notifications of new posts by email.

What we’re doing when we’re not blogging!

Follow on Instagram
This error message is only visible to WordPress admins
Error: There is no connected account for the user 17841401233545030.
Foodista Food Blog of the Day Badge

Copyright © 2023 · Lifestyle Pro Child Theme for More Savory, Less Sweet on Genesis Framework · WordPress · Log in