• About the Author
  • Recipe Index
  • Contact Me
  • The Kitchen Crew
  • The Legal Necessities

More Savory, Less Sweet

Adventures in Food - Taste, Explore, Inspire and Share

Search Results for: pie crust

First of Fall: Apple and Blackberry Pie with Detailed Pie Crust Instructions

09/29/2013 by Laura Leave a Comment

Wow, it seems we are skipping fall and diving head first into winter.   We had the most rainfall EVER RECORDED in  September, on Saturday, and more is on the way accompanied by wind gusts in the 30-50 mph range!  We received 1.71 inches of rain in 24 hours, which nearly doubled the previous record of .83 inches.  You can understand why I chose to stay in and bake pies!

pie and cordon bleu 009.2

I am reprinting the pie crust instructions from a few posts back, in case you missed them.  I do use a different pastry recipe for a sweet pie, than I did for the savory pie.   I  quadrupled  this pastry recipe, since I was making two pies.  I have a 14 cup food processor and it was all it could handle.

pie and cordon bleu 237.2

For the Pie Crust

This recipe is for each, single crust.  Double it for a two crust pie.

1 Cup All Purpose Flour ( I use Bob’s Red Mill Organic, Unbleached White Flour)

2 Tablespoons of organic sugar

4 ounces, one stick, organic, unsalted butter – diced into small dice and frozen 15 minutes

1/2-1/2 cup ice water

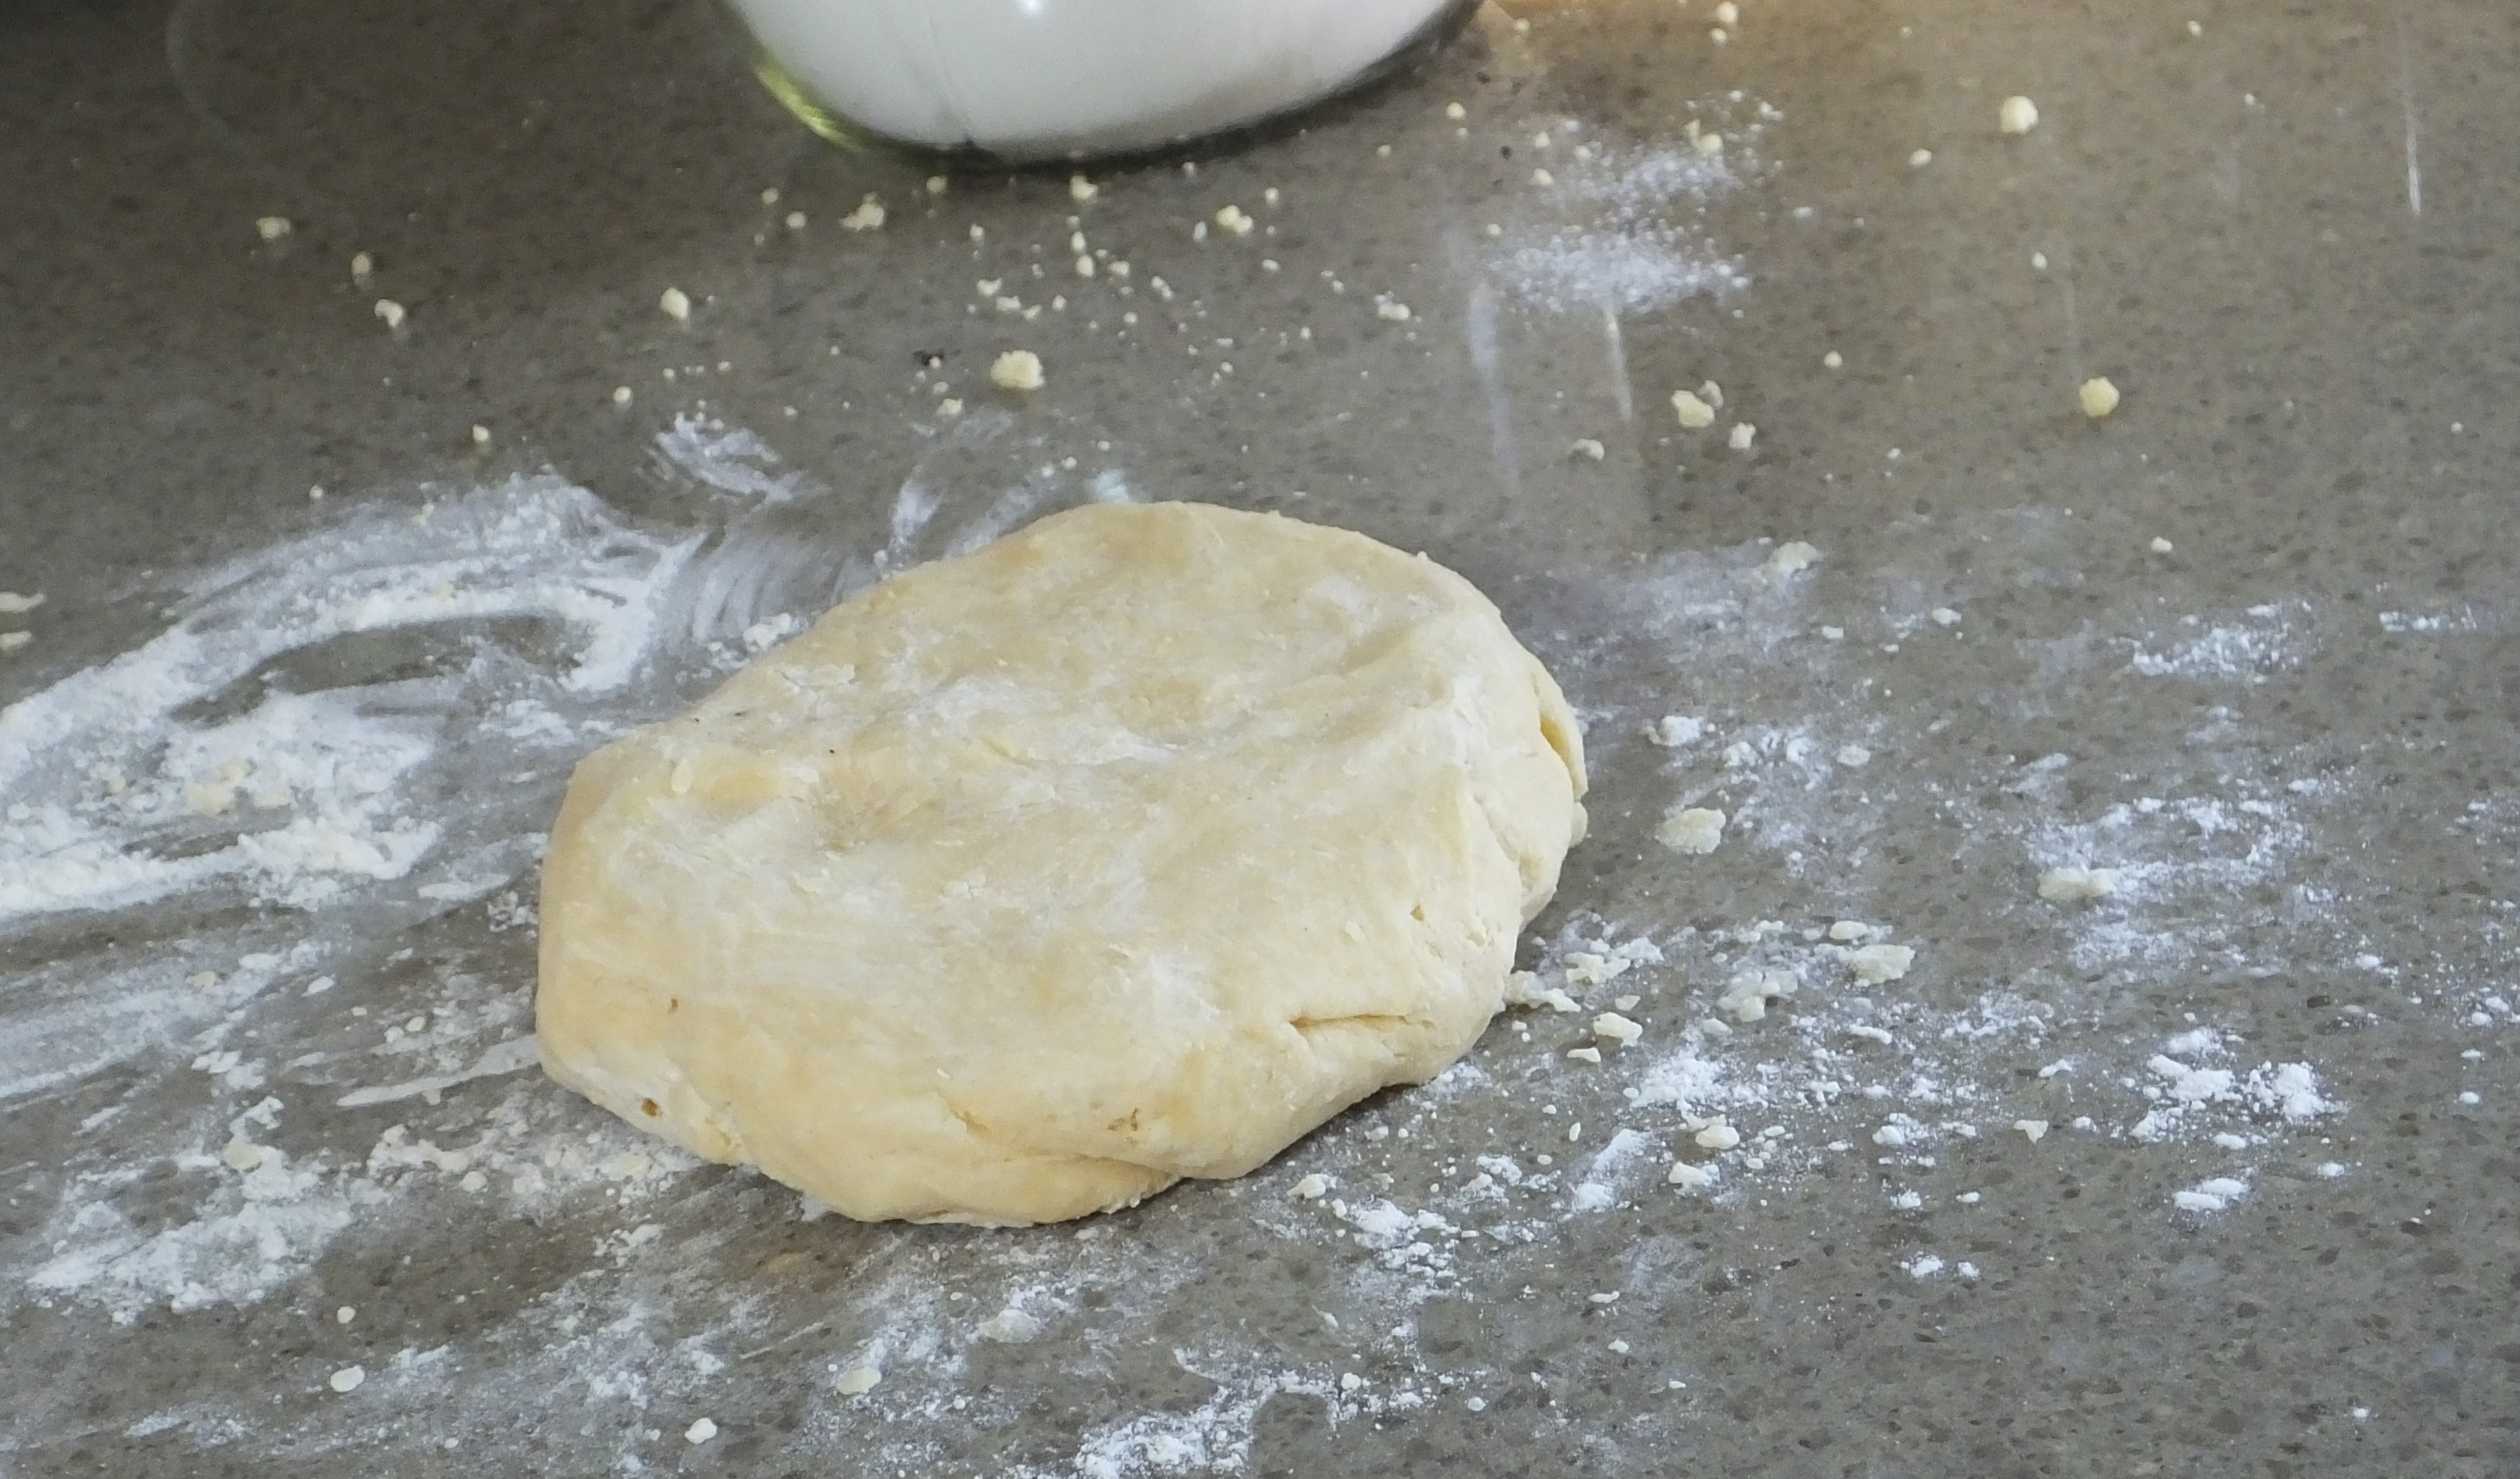
Have all your ingredients ready to go. (pic 1) Put the flour and 1/2 teaspoon salt and sugar in the bowl of a food processor fitted with the steel blade.  Add the frozen diced butter to the bowl, and (pic 2) pulse until the butter is the size of peas.  With the machine running, add the ice water a tablespoon at a time, and process until the dough becomes crumbly (pic 3). Don’t over process. (pic 4) Dump the dough out on a floured board, (pic 5) gather it loosely into a ball, wrap in plastic wrap and refrigerate for 20 minutes.

tart 002.1

tart 003.1tart 007.1tart 008.1


While the dough chills, make your filling.

For two pies

8 large apples, peeled, cored and thinly sliced – any combination or one variety

2 Tablespoons of Minute Tapioca

1 Tablespoon lemon juice

1/2-3/4 cup sugar (depends on the sweetness of the apples and berries)

2 cups blackberries

1/2 teaspoon cinnamon

1/4 teaspoon nutmeg

Butter to “dot” the pie before covering with top crust

pie and cordon bleu 019.2

Gently combine the sliced apples, the berries (if you have some you need to use up, like I did) the spices, lemon juice and tapioca.

Butter the bottom and sides of your pie pans.  Roll the chilled dough on a well-floured surface to desired thickness, and fit it into the bottom of the pan.

Roll the dough onto the pin, and then unroll it into the pie pan.  Heat the over to 425′.

pie and cordon bleu 024.2pie and cordon bleu 028.2


Add the filling to the pie shells, dividing the mixture equally between the two pies.  Top each with 2 tablespoons of butter, cut in little pats.

pie and cordon bleu 041.2

Repeat the above instructions to roll out the top crusts.  Pat the top crust down on the fruit.   Trim the crust to fit the pan, leaving just enough to “crimp”.

pie and cordon bleu 055.2pie and cordon bleu 062.2

With the tip of your knife, make 15-20 “vents” in the top crust.  Make an egg wash by mixing one egg and 2 Tablespoons of water in a small dish.  Brush the top of the pies with the egg wash and then sprinkle with sugar.  (You can  skip the egg wash and sugar, if you choose.  I like the shiny, sparkly results.)

pie and cordon bleu 070.2pie and cordon bleu 083.2pie and cordon bleu 089.2


Place the pies on a baking sheet.  Bake at 425′ for 15 minutes.  Reduce heat to 350′ and bake another 45-60 minutes, or until crusts are nicely browned and mixture is bubbly.  Cool completely before serving.

pie and cordon bleu 095.2


Filed Under: Baking Tagged With: apples, baking, berries, fall, pie, pie crust, video

Savory Tomato Tart with Pesto, Mascarpone and Ricotta Filling – and Detailed Pie Crust Instructions

09/04/2013 by Laura 1 Comment

The tomato “situation” continues at our house.  Don’t think I am not grateful for the bounty of fruit this summer!  It is just sad that the season is so short and it happens all at once!  After making 8 quarts of sauce this weekend, I still have about 30 pounds of tomatoes, in varying stages of ripeness.

I searched the internet for a Tomato Tart recipe that would incorporate all the things in my refrigerator that I needed to use up.  Pesto, Mascarpone, Ricotta, Parmesan…. I found variations, but not exactly what I wanted.  Below is the combination I came up with.  It was quite yummy!

tart 139.2

Laura’s Tomato Tart

Prepare the crust

Pie crust preparation has been revolutionized by the food processor!  I only started making crust about 3 years ago.  Up to that point, I used the frozen or refrigerated options.  There were a couple of good reasons:  First, I really did not have a proper counter to roll out dough, until the kitchen remodel in 2010!  Second, I think I inherited “fear of dough” from my Mom.  I will never forget walking in the door from school at about age 10, just in time to hear my Mom let out a word I had not heard her use before, while watching the dough, bowl and rolling-pin go into the garbage can!  I don’t remember what happened after that…. I don’t think there was a pie!  Anyway, if you have a food processor, make the crust from scratch.  It is worth the effort and you know exactly what is in it!  Detailed instructions below.  This is a very easy dough to work with.

(The Crust Recipe is Ina Garten’s, from Barefoot in Paris, 2004)

1 1/2 cups regular flour, plus more for dusting the board

1/2 teaspoon Kosher salt

12 tablespoons cold unsalted butter, divided

3 to 4 tablespoons ice water

Have all your ingredients ready to go. (pic 1) Put the flour and 1/2 teaspoon salt in the bowl of a food processor fitted with the steel blade. Cut 12 tablespoons (1 1/2 sticks) of the butter into large dice, add to the bowl, and (pic 2) pulse until the butter is the size of peas.  With the machine running, add the ice water a tablespoon at a time, and process until the dough becomes crumbly (pic 3). Don’t over process. (pic 4)Dump the dough out on a floured board, (pic 5) gather it loosely into a ball, wrap in plastic wrap and refrigerate for 30 minutes.

tart 002.1

tart 003.1tart 004.1

tart 007.1tart 008.1

Roll the chilled dough on a well-floured surface to desired thickness, and fit it into tart pan. Roll the pin over the top to cut off the excess dough.

(Thanks for the video and music, Dave!)

???????????????????????????????

tart 015

Cut a square of foil to fit into the pan.  Spray with olive oil spray on one side and place, oil side down, into the tart pan.  Fill the foil with beans or pie weights.

tart 038.1 tart 046.1

Bake for 20 minutes. Remove the beans and foil from the tart shell, prick the bottom all over with a fork, and bake for another 10 minutes.

tart 065.1

Prepare the filling

Place all ingredients in a bowl and mix well.  Chill in refrigerator until ready to use.

8 oz. Mascarpone cheese

8 oz. Ricotta cheese

1 cup grated Parmesan

2 eggs

3 Tablespoons Pesto

Salt and Pepper

tart 010

Prepare the tomatoes

Line a baking pan with parchment paper and spray lightly with olive oil spray.  Slice the tomatoes into fairly thick slices and place on the paper.  Season with salt and pepper and roast at 350′ about 15 minutes.  Set aside until ready to top the tart. (Pre-roasting ensures the tart will not get too watery.) Tomato varieties below are Brandywine, Green Zebra and Juane Flamme.

tart 012.1

Assemble the Tart

Pour the prepared cheese mixture into the pre-baked tart shell.  Bake 75% of the way done – about 40 minutes at 350′.  Place the roasted tomatoes on top and return the tart to the oven for another 10 – 15 minutes, until firm.  Serve the tart at room temperature, with a little fresh basil sprinkled on top.

tart 134

Filed Under: Appetizers, Baking, Quick - Week Night, Vegetarian Tagged With: mascarpone cheese, pesto, pie crust, ricotta, tomato

Farmers Market Treasures – Strawberry Rhubarb Pie and Spring Pea Salad

07/05/2017 by Laura 3 Comments

Wow…4 months since my last post!  I’ll catch you up on the reasons for that, but first I have a couple recipes for you!  Both of these dishes are the result of an over-the-top buying spree at last weeks neighborhood farmers market.  It was my first outing of the season and everything was calling my name!  The perfect weather, the beautiful fruits and vegetables, plenty of cash, and a longing to get back into my kitchen resulted in two very large bags of goodies.  I bought far more then we needed for one week.  With a few things approaching the end of their usefulness, I got busy to ensure none of it would go to waste!  The results were a fantastic Strawberry-Rhubarb pie and an over the top “spring on a plate” pea salad.

The salad is a result of a Google search based on the unused veggies I had bought…shelling peas, pea pods, and ramps.  I had asparagus on hand, as I always have asparagus on hand until it disappears from the market or becomes ridiculously expensive.  I found this recipe on the Serious Eats website.  I made just a couple alterations, and it was fantastic.  I felt like it was something that would be a first course in a fancy French restaurant… ooh la la!

For the Vinaigrette:

6 tablespoons extra-virgin olive oil

2 tablespoons juice from 1 or 2 lemons

2 tablespoons finely minced fresh parsley leaves

1 small shallot, minced (about 1 tablespoon)

1 teaspoon Dijon mustard (my addition)

Kosher salt and freshly ground black pepper

Whisk the ingredients together and set aside.  I always make my dressing in a measuring cup to make it easy to pour.

For the Salad

1 cup fresh shelled English peas

2 cups fresh sugar snap peas, strings removed, ends trimmed, cut into 1/2-inch pieces on the bias

1 pound asparagus, stalks trimmed, tips removed, tips and stalks reserved separately

2 to 3 tablespoons extra-virgin olive oil

8 to 12 whole ramps, ends trimmed and cleaned

1 large very fresh egg, per serving

2 tablespoons distilled white vinegar

Place a pot of water on the stove.  Salt heavily.  Bring to a slow simmer.  Blanch the shelled peas, then the snap peas and then the asparagus tips, about 1 minute, until bright green.  Remove with a slotted spoon.  Dip in an ice water bath. Place each vegetable in a small bowl and pop in the fridge.

Blanch the asparagus stalks until tender and place in a blender cup with a couple tablespoons of the blanching water and 2 Tablespoons of olive oil. Puree until smooth.  Set aside.

Meanwhile, prepare the ramps.  Heat a tablespoon of olive oil in a heavy sauté pan.  Saute the ramps until tender.  Place on a paper towel line plate.  Set aside.

When ready to assemble the salads, bring the pot of water back to a slow simmer.  Add 3 tablespoons white vinegar.

Combine the peas and asparagus in a bowl.  Add the dressing and toss gently.

Make your poached eggs, one per serving.  Place a couple tablespoons of the asparagus puree on each serving plate.  Top with the pea and asparagus salad mixture.  Place the poached egg on top.  Season with salt and pepper.  Serve immediately! 


Ok, now for the pie!  Strawberry – Rhubarb.  Not typically my first choice, when I think of a pie I want to eat / make.   I honestly have a problem with most fruit pies as they always turn out to be thin, watery, runny, too sweet, too sour, fall apart messes on a plate.  I decided to try a different approach this time.  I roasted the fruit first.  This allowed me to taste the fruit and adjust the sweetness, as well as remove some of the extra juice, prior to filling the pie shell.  I will be using this technique for all future fruit pies.

For the Strawberry – Rhubarb Pie

Prepare pie crust for 2 crust pie – make your favorite or check mine out here.

4-5 cups fresh, ripe, strawberries – green part removed – sliced in half if they are large

4-5 cups fresh rhubarb, chopped into small, bite size pieces

3/4 cup of sugar

Place the fruit on a sheet pan, sprinkle with the sugar and roast at 375′ for about 20 minutes.

Remove the pan from the oven.  Let rest about 10 minutes.  Adjust the sweetness to taste.  Add:

4 Tablespoons of flour

2 Tablespoons of quick cook tapioca

1/2 teaspoon of cinnamon

finely grated zest of one lemon

juice of one lemon – about 2 tablespoons

Mix all ingredients together in the roasting pan.  Spoon into piecrust with a slotted spoon.

Place the top crust on the pie.  Pinch the edges and cut steam vents.  Place on a sheet pan.  Place a foil collar around the edges of the pan.  Bake at 425′ for 15 minutes.  Reduce the heat to 375′, remove the foil, and bake 30 more minutes.  Let pie cool at least 2 hours before serving. You definitely want to serve this with vanilla ice-cream!  Enjoy!

Ok – on to the updates…In my last post, I mentioned I retired.  What that has meant for me is working harder then I ever have, without a pay check every other Friday. LOL!!!  I have been away from home, more then I have been at home, these past few months.  Thankfully, it’s not that much different for Dave, then when I was working full time! He’s always been spectacular at fending for himself and holding down the fort.

The work began when my Mom bought a new house.  She no longer needed stairs, 3000 square feet and a quarter acre yard!   She bought the new house last fall, but we really didn’t get busy moving her to her new place until April.  Mom updated 80% of her new place, which took a lot of time, decisions and work.  Dave and I helped out by repairing decks and fences, and assembling cabinets and other things.  Her new home has turned out to be a wonderful place for her.

Her move left us with the BIG job.  Emptying and selling her old house.  We  spent the past few months sorting, packing, selling, donating, dumping, laughing, crying, screaming, and yelling our way through about 25 years of stuff!  For those of you that have been through this, you know what I’m talking about!  For those of you that have not…my advice would be to START NOW!  I am so thankful I was able to go through family things WITH my Mom.  I know what all the stuff is, who the people in the pictures are and what mattered to she and my Dad.  I am still selling things on Ebay and I have a lot of pictures to scan, but the hard work is behind us.  I am happy to say that her house sold in 8 days.  She has a few things planned for fall, and none of those plans include yard sales or moving! For those of you that don’t know, my Mom is 88 years old!  She is absolutely amazing.  We worked side by side, hours on end, with her frequently ordering me to “sit down and rest”.  We should all be so healthy and spunky!

With Mom’s big project behind me, I can start to sort out what retirement really does mean for me.  You can see from the above, I am really happy to be able to wrap my head around cooking and photography again.  Dave and I are taking our own advice of “starting now” on sorting, selling things and downsizing.  Bit by bit, we are getting rid of the unnecessary things we’ve accumulated…just because we could!  It’s amazing to me how quickly stuff accumulates, and how little of it we really “need”.

It’s been great catching up. Thanks for stopping by!  Enjoy the food and have a wonderful evening.

Laura

Filed Under: Appetizers, Baking, Dessert, Vegetables, Vegetarian Tagged With: appetizer, asparagus, dessert, egg, farmersmarket, pea pods, peas, pie, ramps, Rhubarb, strawberries

Bumper Crop Blueberry Pie

07/31/2014 by Laura 2 Comments

Our blueberry bushes are loaded with large berries in various stages of ripeness.  The weather has been just perfect for them.  I barely picked two gallons last year.   I have picked about 4 gallons already.

blueberries 9.2

So what do you do with an abundance of blueberries?  You make pie, of course!  This time, I made two.  One for a friends birthday and one for my nephew, who just finished his bar exams.  Lots of reasons to celebrate with pie.

bb pie 019.2

Laura’s Blueberry Pie 

pastry for 2 pies – detailed pie crust instructions here

Preheat the oven to 450′.

8-10 cups of blueberries, picked over to remove stems, leaves and green berries then rinsed and drained

2 cups of sugar

1 teaspoon cinnamon

1/2 cup quick cook tapioca

1/4 cup flour

4 ounces of butter

Prepare crust for two pies – or 1/2 recipe, one pie

Mix the berries, sugar, cinnamon, tapioca and flour together in a large bowl,  very gently.

Pour the mixture into the prepared pie pans.

Cut two slices of butter into 4th’s and dot the pie with the butter.

bb pie 008.2

Add the top crust.  Trim evenly as shown in detailed pie crust instructions linked above.  If you like, add little cut outs made from the remaining dough.  Brush the crust with milk and sprinkle with sugar.  Place each pie on a baking sheet lined with parchment paper.  This makes the spill over a breeze to deal with!

bb pie 017.2

Bake for 10 minutes at 450′.  Reduce heat to 350′ and bake another 40 minutes.  Rotate pies half way through the baking process.  Let cool completely and then refrigerate.  Serve with a big scoop of your favorite vanilla ice cream.

bb pie 016

I almost forgot to mention…There is one more celebration happening today.  Cooper is turning 3 years old and has officially been a part of our family for two years!  (We adopted him on his 1st birthday.) It is traditional for our dogs to get an ice cream cone on their birthday!  Happy 3rd Birthday Cooper, and many more!

cooper bd 003.2


Filed Under: Baking, Dessert, Gardening, Vegetarian Tagged With: blueberries, dessert, pie

Ooeeyy Geewwyy Chocolate Pecan Pie Bars

11/15/2013 by Laura 1 Comment

I got the urge to bake something sweet today.  I checked the cupboards, surveyed the ingredients and decided on Chocolate Pecan Pie Bars, from the Betty Crocker website.  The results were wonderful and I will likely make these again.  Bar cookies are a quick and easy alternative to a drop or rolled cookie.  I changed up the original recipe and used my food processor for mixing both the crust and filling, as I always try to reduce the number of bowls, cups, spoons et al needed for a recipe.  I also toasted the pecans, before adding them.  This is a good practice when using nuts in a recipe, as it deepens the flavor.

pecan pie bars 006

For the shortbread cookie crust

1 1/2 cups all-purpose flour

4 teaspoons granulated sugar

1/2 teaspoon salt

10 tablespoons very cold butter, cut in squares

2 – 3 tablespoons of ice water

Add all ingredients, except the ice water, to the bowl of a food processor.  Pulse to mix, as if making pie crust.  Add the ice water a little at a time, until a crumbly dough is formed.  Press the dough into a buttered and floured 13×9 baking pan.  Bake for 10-12 minutes, in a 375′ oven until firm and lightly brown.

pecan pie bars 106.2

For the filling

3 eggs

3/4 cup packed dark brown sugar

2/3 cup light corn syrup (HINT – spray your measuring cup with canola oil spray first, and the syrup will slide right out)

2 tablespoons butter, melted (Melt the butter in the microwave in the same cup as you used for the syrup)

1/4 teaspoon salt

2 teaspoons vanilla

2 cups pecan halves, toasted in a 325′ oven for about 10 minutes, and cooled

3/4 cup good quality, dark chocolate chips

Place all ingredients, except nuts and chocolate chips, in the bowl of your food processor.  Mix well.  Add the pecans and give it a quick pulse.  Add the chocolate chips and pulse one more time.

Spread the mixture evenly over the par-baked crust.

pecan pie bars 117.4

Bake 20-30 minutes until mixture is set and color is golden brown.  I have to admit, I overcooked mine a bit, and will keep a very close eye on these the next time I make them.  If they are getting too brown and not yet set, cover with foil and finish baking.

Cool for at least an hour before serving.  Cut into bars.  Enjoy!

pecan pie bars 001.2


Filed Under: Baking Tagged With: bar cookies, pecans

First Sign of Spring…Strawberry Pie

03/30/2013 by Laura Leave a Comment

ebay and easter 130

The first time I had fresh Strawberry Pie was at Le Petit Café in West Richland, WA.  Le Petit Café was the only French restaurant for miles around.  Saving for years to move to America, Didi and Pierre bought the place sight unseen from their home in France.  Since this was long before one could search out property on the internet, they were quite shocked when they arrived in Eastern Washington and found their selves in the middle of nowhere! They quickly got to work and created a successful restaurant.  Over the years , their fabulous food and charming personalities led to a large roster of regular customers, as well as customers who drove from far away, specifically for Didi’s Strawberry Pie.  Due to the popularity of the pie, you actually needed to reserve your serving right along with your table!

While this is not Didi’s pie (she would never “give up” the recipe) it is the version my Mom and I have been making since the early 70’s.

Ingredients

One pie crust, of any size you choose, baked according to directions

2-3 quarts of ripe strawberries – Reserve 12-15 of the best berries for the top of the pie

approx. 8 oz whipped cream cheese

Strawberry Glaze – about 2 cups – prepared according to directions and cooled slightly

I have made the glaze from scratch.  However, I more often use Junket Strawberry Danish Dessert.   You can usually find it in larger supermarkets near the jello or pudding mixes.

???????????????????????????????ebay and easter 103

I did get a small crack in my crust – no worries – the next step will take care of that!

Gently cover the bottom of the baked crust with the whipped cream cheese.  Not only does this keep the crust from getting soggy, it adds another dimension of flavor.

???????????????????????????????

Next, slice clean hulled strawberries in half and cover the bottom of the pie.

ebay and easter 119

Drizzle a small amount of the prepared strawberry glaze over the first layer of strawberries.  Keep in mind, this is just to “set” the berries in place.

Continue to fill the pie with slices of strawberries, alternating with drizzles of glaze between layers,  to ensure stability of the pie.

ebay and easter 122Once you have filled the pie with sliced berries, top the pie with the reserved “best berries”, in a decorative fashion, stem side down.  Drizzle the upright berries with a small amount of glaze to ensure they are “glued” in place.  Chill the pie for a minimum of 6 hours, or overnight.  Serve with a dollop of freshly whipped cream.  Bon apetite!

???????????????????????????????

Filed Under: Baking Tagged With: Spring, srawberry

Strawberry Rhubarb Shortbread Bars

05/31/2015 by Laura 2 Comments

This is one of my favorite weekends of the year.  Amma is here in the Pacific Northwest as part of her summer tour.  For many years, my dear friends Andrea, Sharon and Andrea’s son Jack have migrated to Seattle from Vancouver, BC to attend Amma.  This year was no exception.  To celebrate the visit, we made a glorious meal for Saturday’s dinner.  Dave made his world famous macaroni salad and barbecued chicken.  We also had some of the best early summer corn we have ever had.  My contribution was the strawberry-rhubarb shortcake bars I concocted on Saturday afternoon. I had gone to the produce stand to get things for juicing. When I saw the bright red stalks of rhubarb sitting next to the strawberries…. I decided I would come up with something for dessert.  I didn’t want to make a pie as I was also making quiche for the weekend, and I am not that into pie crust in the first place.  I wanted something  everyone could just help themselves to; like a bar cookie.  A quick internet search led me to Carla Hall’s Strawberry Shortbread Bars.  Perfect….I just had to incorporate my rhubarb.   None of us care for things “too sweet” and the contrast of  lemon, rhubarb and strawberry is a total winner.  This recipe could actually accommodate any summer fruit.  Blackberries rule, here in Seattle, which has me thinking about a blackberry, Thai basil and lime combination.  Ooh la la!

rhubarb bars 044.2

Strawberry Rhubarb Shortbread Bars

1/2 pound butter softened

1 cup granulated sugar

1 teaspoon vanilla extract

1/2 teaspoon salt

1 3/4 cup all purpose flour

1/2 cup almond flour

2 cups sliced strawberries

2 cups sliced rhubarb

1/4 cup lemon juice

2 teaspoons finely grated lemon zest

2 tablespoons of sugar

1/2 cup Strawberry Jam

Heat the oven to 350′.  Prepare a 9 x 13 baking pan by greasing it with a little butter.

In the bowl of the food process combine the butter and the sugar.  Add the vanilla, salt, flours and pulse until coarse and crumbly.

Set aside about 1/2 cup of the mixture in the refrigerator.  Pat the remaining dough into the prepared pan.  Make sure it is even.  Poke the shortbread with a fork to allow steam to escape.  Bake until lightly brown around the edges, about 15 minutes.  Remove from the oven and let cool.

rhubarb bars 018.2

While the shortbread is baking, prepares the strawberry rhubarb mixture.  Place the lemon juice and remaining sugar in a medium pot.  Warm over medium-low heat.  Add the rhubarb and bring to a simmer.  Cook the rhubarb until it is soft, about 7 minutes.  Add the strawberry jam and return to a simmer.  Add the sliced strawberries and cook another 5 minutes.  Add in the gated lemon zest.

rhubarb bars 020.1

Spread the mixture over the shortbread.  Make crumbles out of the remaining shortbread dough that was chilling in the fridge and sprinkle them over the top of the fruit mixture.  Return the pan to the oven and bake until the shortbread crumbles are golden.

rhubarb bars 024.1

rhubarb bars 026.2

Let cool and refrigerate.  Serve with a big scoop of your favorite vanilla ice cream.

Enjoy, with gratitude and great friends!

Have a wonderful evening,

Laura

rhubarb bars 0424.2

rhubarb bars 028.2

Filed Under: Baking, Dessert, Vegetarian Tagged With: Rhubarb, shortbread, strawberries

Holiday Cookies – It’s the most sugar-ful time of the year…..

12/21/2013 by Laura Leave a Comment

I guess you can tell by my lack of posts, things have been a little busy around here!  Between a few big projects at work and getting ready for Christmas, there has not been time to photograph and write as routinely as I like.

I love to bake.   I do not bake often as neither my husband nor I need piles of treats around!  When I do bake, it is to share and Christmas is my favorite time of the year for sharing treats with my friends and family.  This year was no different from years past, when I stated, “I am just going to do a couple of things”.   As you can see, that did not happen.  As soon as the calendar hits November 1st, the magazines, and blog posts, and emails all feature a NEW sugary concoctions that MUST be tried!  Our kitchen has been coated with a light dusting of flour for over three weeks.   The dining room table is covered in containers and sheet pans and sugar.  Once again, I got a little carried away, but I had a lot of help!

holiday baking, snow 215.2

laura_cookie_idea_2_with_test_centered

The Fudge

holiday baking, snow 204

I always start with fudge.  My Grandmother and my Mom always made fudge at the holiday’s.  I have a couple of friends that  start calling the first week of December, wondering if it has been made yet!  I use the basic Kraft marshmallow cream fudge recipe.  However, I use very good quality chocolate and nuts to make it special. (I triple the recipe to fill a 2″ hotel pan, which is 12″ x 20″)

3 cups  sugar
3/4 cup  butter
1 small  can (5 oz.) evaporated milk (about 2/3 cup) (Do not use sweetened condensed milk.)
12 ounces of semisweet or bittersweet chocolate, chopped (I use 60% bittersweet and 40% semisweet Scharffen Berger chocolate)
1 jar  (7 oz.) Marshmallow Creme
1 cup  chopped, toasted pecans or walnuts
1 tsp.  vanilla

Butter a 9″ square pan. Bring sugar, butter and evaporated milk to full rolling boil in 3-qt. saucepan on medium heat, stirring constantly. Cook 4 min. or until candy thermometer reaches 234°F, stirring constantly. Remove from heat. 

Warm the chocolate in a small glass bowl in the microwave, for about 30 seconds.  Add the chocolate and marshmallow creme; stir until melted.  Mix and mix and mix some more with an electric beater!   Add nuts and vanilla; mix well.

Pour into prepared pan; spread to cover bottom of pan. Cool completely before cutting into squares.

Christmas Toffee Bars, from “Cuisine at Home, Holiday Cookies”

holiday baking, snow 200

Makes one 13 x 9 inch pan.  I doubled the recipe to make one 13 x 18 half sheet pan.

For the crust, combine the following ingredients.  Press into the buttered baking dish.  Bake at 350′ for 8 minutes.

2 cups crushed vanilla wafer cookies (smash in a zip lock bag)

1/4 cup dark brown sugar

1/3 cup melted, unsalted butter

While the crust is baking, melt together 1 stick of unsalted butter and 1/2 cup of brown sugar.  Bring the mixture to a boil, and boil 1 minute.   Pour the mixture over the baked crust.  Return to the oven, bake 10 more minutes and let rest 2 minutes.

Sprinkle 8 ounces of chopped chocolate, or one cup of chocolate chips over the bars.  Spread to smooth.  Top the chocolate with 1/2 cup chopped, toasted walnuts or pecans.  Let the bars cool completely and cut into 1″ squares.

Black Forest Crinkle Cookies, from “Cuisine at Home, Holiday Cookies”

holiday baking, snow 193

Whisk together:

3/4 cup all purpose flour

3/4 cup sugar

3/4 teaspoon baking powder

1/4 teaspoon salt

Melt 1/2 stick, 4 tablespoons, unsalted butter in a small bowl

add 1/3 cup cocoa powder (not Dutch process), 1 egg, 2 Tablespoons of strong coffee, 1/2 teaspoon pure vanilla extract.  Mix well.  Add to the dry ingredients and mix well.  Fold in 1/3 cup chocolate chips or chopped chocolate pieces and 1/3 cup dry, chopped tart cherries.

Chill for dough about 30 minutes. Preheat oven to 350′  Line baking sheet with parchment paper.  Roll the dough into 1 inch balls.  Roll in powdered sugar, 2 times.  Bake 12-14 minutes.  Let cookies cool on pan 5 minutes before moving to rack.

Savory Fennel Pollen Shortbread with Red Onion Jam, from Ashley Rodriguez, Not Without Salt Blog

holiday baking, snow 194

If you haven’t checked out Not without Salt, you are missing out on great recipes and delightful stories.  I am lucky to have taken Ashley’s Cookie Boot Camp class at The Pantry at Delancey, where I first had the shortbread cookies with jam.  Spread the cookies with a little goat cheese or blue cheese, and top with the red onion jam for the perfect appetizer or dessert.   I cannot think of a better accompaniment to a midnight glass of champagne, than these cookies.

Red Onion Jam, adapted from Food & Wine

1 tablespoon unsalted butter

2 medium sweet onions, julienned

1/2 cup sugar

1/3 cup dry red wine

1/3 cup red wine vinegar

1/3 cup grenadine

pinch of salt

Melt the butter in a medium skillet. Add the onions and cook over moderate heat, stirring, until soft and just translucent, about 8 minutes. Add the sugar, wine, vinegar, grenadine and a pinch of salt. Cook over low heat, stirring, until the liquid thickens and coats the back of a spoon, about 35 minutes. Transfer the onion jam to a bowl and let cool.

Fennel Pollen Shortbread, adapted from Ina Garten

3/4 pound butter, softened

1 cup sugar

3 1/2 cups flour

1 1/4 teaspoon kosher salt

1/2 teaspoon fennel pollen, plus about 2 more Tablespoons for rolling the dough in (You can find at a few gourmet stores and online.)

Preheat the oven to 350 degrees F.

In the bowl of an electric mixer with the paddle attachment, cream together the butter and 1 cup of sugar until they are just combined. Add the fennel pollen. In a medium bowl, sift together, with a whisk, flour and salt; then add them to the butter-and-sugar mixture. Mix on low speed until the dough starts to come together. Roll into a log about 2 inches in diameter. Sprinkle a generous amount of fennel pollen to cover the the log. Cover in wax paper or parchment. Chill until firm.

Carefully slice the log into 1/4″ cookies. Place the cookies on an sheet pan covered with parchment. Bake for 11-13 minutes, until the edges begin to brown. Allow to cool to room temperature.

Fleur de Sel Caramels, Ina Garten, Food Network Magazine

holiday baking, snow 177

I have been making these for about 4 years now.  Due to a faulty candy thermometer, it took three tries this year!  Take my advice – use two thermometers, or at least one that your trust implicitly!  I actually quadruple this recipe and use a 10″ x 15″ glass pan.  I recommend making the single recipe and watching a video or two, if you have not made candy before.  Dave, the WRAPPER, saved a lot of time this year by using pre-cut candy wrappers!

1 1/2 cups sugar

1/4 cup of water

1/4 cup light corn syrup

1 cup heavy whipping cream

5 tablespoons butter, unsalted

1 teaspoon fine fleur de sel,  plus extra for sprinkling

1/2 teaspoon pure vanilla extract

Butter an 8″ square baking pan, set aside.

In a deep, heavy saucepan  combine  1/4 cup water, the sugar and white corn syrup and bring them to a boil over medium-high heat. Boil until the mixture is a warm golden brown. Don’t stir — just swirl the pan.  Very important to prevent the formation of crystals.

While the sugar syrup is cooking, in a small pot, bring the cream, butter and 1 teaspoon of fleur de sel to a simmer over medium heat. Turn off the heat and set aside.

When the sugar mixture is done, turn off the heat and slowly add the cream mixture to the sugar mixture. Be careful — it will bubble up violently. Stir in the vanilla with a wooden spoon and cook over medium-low heat for about 10 minutes, until the mixture reaches 248 degrees F (firm ball) on a candy thermometer.  (I also used my digital thermometer.)

Very carefully (it’s hot!) pour the caramel into the prepared pan.  Sprinkle with fleur de sel.  Cool until firm.

When the caramel is firm, cut into squares by prying one strip at a time from the baking pan, and cutting on a cutting board. Wrap the candies.


Lemon Thyme Wreaths, From  The Art of the Cookie: Baking Up Inspiration by the Dozen by Shelly Kaldunski

holiday baking, snow 191.2

This cookie almost won me a trip to the loony bin!  It was one of the last minute impulse cookies, I made.  It showed up in my email box from I Village Food, looking so lovely, I had to try them.  When Dave saw me placing the thyme leaves on the cookies with a pair of tweezers, he became very worried that I had “gone over the edge of the cookie sheet”, so to speak!  They were fun to make and are very pretty as well as tasty.

2 cups all purpose flour, plus more for dusting and rolling

1/2 teaspoon baking powder

1/4 teaspoon salt

1 cup unsalted butter, at room temperature

1 cup granulated sugar

1 large egg, separated

1 tablespoon finely grated lemon zest

2 teaspoons fresh lemon juice

1 bunch fresh thyme, leaves and tips picked

1/2 Recipe Royal Icing: http://www.joyofbaking.com/RoyalIcing.html

In a bowl, whisk together the 2 cups flour, the baking powder, and the salt. In a large bowl, using an electric mixer on medium-high speed, beat the butter, shortening, and granulated sugar until light and fluffy, 2—3 minutes. Add the egg yolk and lemon zest and juice and beat on low speed until the egg is completely incorporated. Beating on low speed, slowly add the flour mixture and continue to beat just until incorporated, scraping down the sides of the bowl as needed. Press the dough into a 7-inch (18-cm) disk. Wrap tightly in plastic wrap and refrigerate until firm, at least 1 hour or up to overnight.

Preheat the oven to 325°F (165°C). Line 3 baking sheets with parchment paper. In a small bowl, whisk the egg white with 2 teaspoons water.

On a lightly floured work surface, using a floured rolling pin, roll the dough to about 1⁄4 inch (6 mm) thick. Using a 21⁄2-inch (6-cm) round cookie cutter, cut out as many shapes as possible. Use a metal spatula to transfer the cookies to the prepared sheets, spacing them 1 inch (2.5 cm) apart. Use a 1-inch round cookie cutter to cut a small circle from the center of each shape. Press the dough scraps together, roll out, and cut out additional wreaths. Brush each wreath with the reserved egg white mixture and top with the thyme leaves and sanding sugar.

Bake until the cookies are lightly golden around the edges, 14 – 17 minutes. Let cool on the sheets for 5 minutes. Using the spatula, transfer the cookies to wire racks and let cool, about 30 minutes. Spoon the icing into a paper cone with a 1⁄8-inch (3-mm) round tip (page 15). Pipe dots of icing on each wreath. Let the icing dry completely, about 2 hours.

Raspberry Streusel Bars, from The Joy of Cooking

holiday baking, snow 198.2

This is one of my favorite cookies to enjoy with a cup of coffee.  Almost more of a pastry than a cookie.  I made them special this year, by using my raspberry jam that I made this summer.  (See “Keeping Up With Summer”post, August 10, 2013)  I doubled the recipe and made a 13 x 18 1/2 sheet pan.

Generously grease a 13 x 9 inch baking pan.  Stir together in the bowl of a food processor:

2 cups of all purpose flour

1/4 cup of sugar

1/4 teaspoon salt

Add 12 ounces, 1 1/2 sticks, cold, unsalted butter, cut in small cubes.  Pulse mixture, as you would making pie crust.  Add in 3 tablespoons of milk and 1 teaspoon of almond extract.  Pulse a couple more times. Firmly press the dough into the baking pan.  Refrigerate 15 minutes. Preheat oven to 375′.  Bake 12-15 minutes until the dough is just firm.  Remove from oven and spread the crust with once cup of raspberry preserves or jam.

Prepare the streusel topping.  Whisk together:

1 1/4 cup flour

2/3 cup sugar

1/2 teaspoon ground cinnamon

1/4 teaspoon salt

Sprinkle over the top:

8 tablespoons of cold, unsalted butter, cut into tiny cubes.

Pulse the mixture in the food processor until crumbly.  Add 3/4 cup sliced, blanched almonds and 1/2 cup old fashioned rolled oats.  Pulse again to mix. Add in 1 beaten egg mixed with 2 tablespoons of milk.  Pulse a few times to blend.  Crumble mixture over the raspberry preserves.  Return to oven and bake 25 to 30 minutes, until streusel is lightly brown.  Cool completely and cut into bars.

Mexican Wedding Cakes, from The Joy of Cooking

xmas cookies 002.2

2 sticks softened, unsalted butter

1/2 cup powdered sugar

2 teaspoons vanilla

1 cup finely chopped, toasted pecans or walnuts

2 cups all purpose flour

Cream the butter, sugar and vanilla in the bowl of a stand mixer.  Add in the chopped nuts.  Slowly add in the flour.  Roll the dough into one inch balls.  Bake at 350′ on a parchment lined baking sheet until faintly brown, about 12 minutes.  Let the cookies cool completely and then roll in powdered sugar.   Store in airtight container.

Peppermint and White Chocolate Chip Cookies

holiday baking, snow 186.2

This cookie came to be because I was given a jar of crushed peppermint candy at a trade show!  I was determined to use up all the baking “stuff” I had accumulated over the past year.  My nephew and husband are really enjoying these cookies!

2 1/4 cups all-purpose flour

1 teaspoon baking soda

1 teaspoon salt

1 cup (2 sticks) butter, softened

1 cup granulated sugar

1/2 cup packed brown sugar

1 teaspoon pure vanilla extract

2 large eggs

24 ounces good quality white chocolate chips

1 cup crushed peppermint candies

1 additional bag of white chocolate chips, 1 teaspoon vegetable oil, 1 teaspoon of milk (or more) to make chocolate drizzle for decorating cookies. (Melt chocolate in microwave in 30 second increments.  Stir in between.  Add vegetable oil and milk and thin to desired thickness.  Place in parchment “cone”.  Cut tip and drizzle over cookies.

Combine flour, baking soda and salt, in a small bowl, set aside.  Cream butter and sugar together until light in color, in large bowl of a stand mixer.  Add the vanilla then the  eggs one at a time, mixing well after each addition.  Reduce the speed on the mixer and add in the flour mixture.  Do not over mix.  Stir in the chocolate and crushed peppermint.  Place dough on a large sheet of parchment or wax paper, and roll into a log.  Chill overnight, minimum.  When ready to bake, slice the logs into 1/4-1/3 inch thickness.  Bake cookies on parchment lined baking sheets about 9 minutes.  Do not over bake.  Let cookies sit on baking sheet about 5 minutes before moving to cooling rack.  Decorate with white chocolate drizzle, if desired.

Coconut Macaroons with a Surprise Center, from Cuisine at Home, Holiday Cookies

holiday baking, snow 212.2

These are called “inside-out” Almond Joy Macaroons in the cookbook.  This year, I wanted a cookie without nuts, so I used plain chocolate kisses, rather than the chocolate almond kisses I have used in the past.    These lean more toward candy than cookie and are absolutely yummy!

1 package sweetened, shredded coconut

1/4 cup all purpose flour

1/4 cup sugar

1/4 cup light corn syrup

1/4 cup cream of coconut

3 egg whites

2 Tablespoons unsalted butter, melted

1 teaspoon pure vanilla extract

pinch of salt

32, approximately, chocolate kiss candies, with or without almonds

Mince 1 1/2 cups of the coconut in a food processor.  Transfer to a mixing bowl.  Add the remaining coconut to the minced coconut and all the other ingredients, except the chocolate kisses.  Mix until well combined.  Chill dough in refrigerator at least one hour.  Preheat oven to 350′.  Line baking sheets with parchment paper.  Shape a spoonful of coconut mixture around a chocolate kiss, enclosing the candy completely.  Place on baking sheet about 1″ apart.  Bake until cookies are firm and deep golden at the base and lightly golden on the top.  Let the macaroons cool on the sheet about 5 minutes before moving to rack. Store in airtight containers.

Extra big Christmas hugs to my husband Dave and my nephew Jacob for the food styling, lighting, photography of all these goodies! And to Jasper and Cooper for keeping the floor clean throughout the entire process!

From the crew at More Savory, Less Sweet – Have Yourself a Merry Little Christmas!

jasper puppy


Filed Under: Baking, Holiday Tagged With: caramel, fudge

Laura’s Baked Rigatoni

05/26/2015 by Laura Leave a Comment

“Life is what happens while your busy making other plans.”    We both have a lot going on, leaving very little time for this piece of my heart.   I will get back to regular posting soon, and I promise to end the year with a bang!  Meanwhile, I want to share this quick and easy casserole with you.  It saved us from expensive takeout Monday night.

After spending the weekend pruning, planting, mowing, trimming, mulching and composting, neither of us were anxious to grocery shop and then cook.  After digging through the pantry and the refrigerator,  we came up with this version of baked rigatoni.  Not your typical Memorial Day fare, but a great week night meal.  This recipe makes about 8 servings; enough to freeze for a future “I don’t feel like cooking”  dinner.  Enjoy!

rigatoni 015.2

Laura’s Baked Rigatoni

1 package Rigatoni, Ziti or Penne dry pasta (about 12 ounces) – cooked al dente, drained and cooled

1 jar of your favorite pasta sauce, about 24 ounces

1 can diced tomatoes, drained, about 14 ounces

1 large red bell pepper, chopped

1 sweet yellow onion, chopped

4 cloves garlic, minced

8 ounces crimini mushrooms, sliced

1 small eggplant, diced into 3/4″ cubes

2 lbs. Italian Chicken sausage

1 12 ounce package mozzarella cheese, cut into small cubes

1/2 cup grated parmesan cheese

1 tsp. Italian seasoning

salt and pepper

2-4 tablespoons of olive oil

Prepare the pasta al dente, according to package directions.  Do not overcook. Drain the pasta and let it cool in the colander.

Prepare a large baking dish / casserole by lightly spraying with oil.  Pre-heat the oven to 350′.

Heat 2 Tablespoons of olive oil in a large skillet,  over medium high heat.  Add the onions, garlic, bell pepper and eggplant.  Saute about 10 minutes, until vegetables are softened.  Transfer to a large mixing bowl.  Add another Tablespoon of oil to the pan and sauté the mushrooms, about 6 minutes, until soft.  Transfer the mushrooms to the mixing bowl.  Add the last Tablespoon of oil to the pan and brown the sausage thoroughly.  Remove the pan from the heat and let the sausage cool down a bit.  Transfer the sausage to the mixing bowl.  Add the cooled pasta, diced tomatoes, pasta sauce, Italian seasoning  and mozzarella cubes to the mixing bowl.  Mix thoroughly.  Taste for salt and pepper and add accordingly.

Pour the mixture into the baking dish.  Top with the grated parmesan cheese.  Cover with foil and bake until bubbly, about 40 minutes.  Remove the foil and cook another 10 minutes.

Enjoy with crusty bread and a crisp green salad.

Thanks for visiting.  Have a wonderful evening.

Laura

In memory of our beautiful kitty, Phoebe.

Phoebe

Filed Under: One Pot Meal, Pasta, Poultry, Quick - Week Night, Uncategorized

Ya Sure, You Betcha … Köttbullar … Swedish Meatballs

11/14/2013 by Laura 2 Comments

I guess these may technically be FINNISH Meatballs…. Since I am not Swedish, but 50% Finnish!  Regardless, they are delicious.  As usual, I looked at a bunch of recipes for ideas.  Since I wanted to make enough for a few meals, I came up with what you see here.  We had a delicious dinner, and 3 more meals worth went in the freezer!  Hurray for leftovers!

swedish meatballs 068.4

For the Meatballs (This recipe made about 60 meatballs)

8 slices soft, white bread, crusts removed, broken into small pieces

1/2 cup milk or cream

Place the bread and milk in a bowl.  Soak the bread until soft.  Mix it up with a fork to make sure it is all softened.

24 ounces ground pork

40 ounces lean ground beef

3 eggs, lightly beaten

1 medium yellow onion, grated (Yes, grated – if you have onion goggles, you will want to wear them!)

1 teaspoon ground allspice

Salt and Pepper

swedish meatballs 024.2swedish meatballs 031.2

1/2 cup of flour

2 quarts beef stock

1 16 ounce container of sour cream

Butter for frying

Combine soaked bread pieces, pork, beef, eggs, onion, allspice and salt and pepper in a big mixing bowl.  Mix and mix and mix and then mix some more.  You want the mixture to be light and fluffy.  If too “wet” to hold together, add a half cup of Panko bread crumbs.  (Yes, these are referred to Japanese bread crumbs.  However, they are made with white bread that has had the crusts removed.  This should not cause an international crisis, as I have seen in some comments on other recipes!)

Pre-heat the oven to 325′.  Shape the meat mixture into 1-2 inch meatballs.  Melt about a tablespoon of butter  in a large sauté pan (or Dutch oven) on medium heat.  Brown the meatballs on all sides, in batches, careful not to crowd the pan.  Move the meatballs to a baking sheet.   Bake the meatballs for 15 minutes.  Remove from the oven and set aside while you make the sauce.

swedish meatballs 043.2

Sous Chef Jasper is convinced a meatball will fall to the floor!  Uh, make that total 59 meatballs!

swedish meatballs 032.2

Heat the sauté pan to medium heat.  Add a little more butter to the sauté pan, if needed.   Add the flour and make a roux.  Add the beef stock slowly and continue to whisk, while bringing the sauce to a boil.  The sauce should be thick and glossy.   You will be adding sour cream in the next step, and will not be able to add additional thickeners.   I actually needed to “tighten up” the sauce a bit so I added, 4 Tablespoons of…..Did you guess it?  BISTO!  I then let the sauce simmer about 5 more minutes.  Reduce the heat to very, very low.  Add the sour cream.  Stir well.  (I used my immersion blender at this stage, to make the sauce as smooth as possible.)  Return the meatballs to the saucepan.

swedish meatballs 060.2

The best part….3 more meals!

swedish meatballs 142.2

Serve with buttered noodles or mashed potatoes and LINGONBERRIES!  Enjoy…

swedish meatballs 068.4


Filed Under: One Pot Meal, Quick - Week Night Tagged With: lingonberries, meatballs

  • 1
  • 2
  • Next Page »

Stay in touch!

Enter your email address to subscribe to More Savory Less Sweet, and receive notifications of new posts by email.

Look here for specific recipes.

Copyright © 2025 · Lifestyle Pro Child Theme for More Savory, Less Sweet on Genesis Framework · WordPress · Log in