• About the Author
  • Recipe Index
  • Contact Me
  • The Kitchen Crew
  • The Legal Necessities

More Savory, Less Sweet

Adventures in Food - Taste, Explore, Inspire and Share

Laura’s Boeuf Bourguignon

07/24/2013 by Laura Leave a Comment

I was flipping through recipes at the NY Times website when I came across Mark Bittman’s Boeuf Bourguignon recipe.  What caught my eye was: TOTAL TIME  2 HOURS.  “No way”, I thought.  Most of the BB recipes I have made in the past require an overnight marinade, and 6 hours of cooking.  Since it was Mark Bittman’s recipe, I decided to give it a whirl, with a few adaptations of my own, of course!

beef burgundy 055.1

Ingredients

Olive oil for sautéing

1/4 pound slab bacon, cut into 1/2 inch cubes (Regular “Sunday” bacon is ok too!)

2 pounds beef chuck, cut into 1 1/2 to 2 inch cubes

Salt and Pepper

1 large onion, diced

1 large carrot, diced

2 stalks celery, diced

4 sprigs of thyme

3 bay leaves

2 cloves crushed garlic

1/2 cup chopped, fresh parsley leaves, plus extra for garnish

1/2 bottle dry red wine, pinot noir preferred

12 small, button mushrooms, trimmed and cut in half

12 pearl onions – I like the convenience of the frozen ones

Cook the bacon cubes in a little oil in a heavy Dutch oven that has a lid.  When bacon cubes are crisp, remove from pan and set aside.  Add meat in batches, not overcrowding the pan, and brown on all sides over medium high heat.  Season with salt and pepper while cooking.  Remove from pan and set aside.

beef burgundy 014

Turn heat down to medium and add onions, carrots, celery, thyme, bay leaves, garlic and parsley.

beef burgundy 019

Cook until all vegetables are softened, about 10 minutes.  Add wine and simmer about 5 minutes.

beef burgundy 024.1

Return meat to pan.  Bring back to a slow simmer.  Cover and cook about an hour. (Because I had extra cooking time available, I continued this phase about two hours. You could also transfer this to a crock pot and cook on low, 6 hours at this stage.)

beef burgundy 028.1

Add the onions, mushrooms and bacon to the pan.  Return to simmer and cook an additional 30-40 minutes.  Adjust salt and pepper to taste.

beef burgundy 032.1

I chose to thicken the stew up a bit with the Buerre Manie technique below.

Buerre Manie for thickening

2 Tablespoons of flours

2 tablespoons of butter

Knead the flour into the butter with your fingers.  Make tiny, pea sized balls.  Add two – three at a time to the simmering stew, until desired thickness is achieved.

Extra instructions here:

http://www.saveur.com/article/Techniques/saveur-100-beurre-manie

Mashed potatoes for serving – we like red potatoes.  We do not remove the peels.

Enjoy!

PS – I hope you are noticing the improvements in the photos!  I took an awesome (and FREE) Food Photography class on line at CreateLIVE this weekend.  What an amazing resource.  Check them out at www.creativeLIVE.com.

Filed Under: French, One Pot Meal Tagged With: beef, mushrooms, red wine

Easy Summer Salad – Orzo Pasta with Shrimp

07/20/2013 by Laura Leave a Comment

Ah those lazy, hazy days of summer.  We are having a record-breaking, dry Seattle summer.  This week has been glorious with temperatures in the upper 70’s.  The morning marine layer keeps things nice and cool until the sun burns through about 2pm.   Even though it has not been THAT hot, making a meal without heating up the stove is always a pleasure.

I have been making this salad for many years.  It was actually on the menu at one of the restaurants I worked at,  a lifetime ago.  I have changed it up a bit, of course, and make it many times over the summer for dinner, lunch or potluck parties.  (Lettuce, tarragon and tomatoes are from the garden!)

orzo pasta salad 119.2

Orzo Pasta Salad with Shrimp

1 16oz box Orzo pasta – cooked according to directions, rinsed and cooled. (do not overcook!)

1 small purple onion, finely chopped

1 large red bell pepper, finely chopped

4 stalks celery, finely chopped

1/4 cup  parsley, finely minced

1 4 oz can sliced black olives – well drained

2 15 oz cans artichoke hearts, quartered – well drained (PACKED IN WATER – NOT MARINATED)

1/2 cup  stuffed green olives – sliced

Mix all together with about 1 cup of mayonnaise.  You do not want this too wet as you will add vinaigrette.

orzo pasta salad 074.2

Vinaigrette:

Put all in a jar that you can shake well:

1 tsp. Fresh minced garlic

2 Tablespoons Dijon mustard

1/3 cup white wine vinegar

1/4 cup lemon juice

about 1 cup fruity olive oil (my FAVORITE Olive Oil is California Olive Ranch Arbequina)

1/2 t. minced rosemary

1/2 minced tarragon

1 teaspoon minced dill

1-2 teaspoons salt

1 teaspoon black pepper

Shake up and pour over salad and mix well.

orzo pasta salad 088.2

Chill at least a couple of hours.

This salad is typically served with small salad shrimp (About 1 lb.) stirred in.  I just put them on top prior to serving, that way the salad keeps longer.

Filed Under: Fish and Seafood, Quick - Week Night, Salads Tagged With: artichoke, olive, orzo, shrimp

Chilled Cucumber Soup and Salad Nicoise with Salmon

07/10/2013 by Laura 1 Comment

Quite a few things came together, all at the right time,  for this meals inspiration.  Lettuce, cucumbers and green beans from the garden, 2 quarts of fresh chicken stock in the fridge,  and really warm weather.  Inspired by the fabulous cucumber soup I had at Les Halles the week before, I decided to give it a whirl.  You will want to start early in the day, as everything needs to be prepped and chilled before serving.

cucumber soup and salad nicoise 203.2

Chilled Cucumber Soup

3 large, fresh cucumbers – peeled, seeded, chopped

1 large leek, cleaned and chopped, white and tender green parts

3 tablespoons of butter

Melt the butter in a saucepan.  Add the chopped cucumber and leeks and sauté over low heat about 20 minutes.  Do not brown, just soften.

cucumber soup and salad nicoise 070 cucumber soup and salad nicoise 073.2

Add two cups of chicken stock, and a little salt.  Simmer very low, about 30 minutes.

Place mixture in blender in two batches, and blend thoroughly.  Pour into bowl and chill until very cold.  (I put the bowl in the freezer to speed up the process.)

cucumber soup and salad nicoise 077.2

Once the soup is cold, place it back in the blender.  Add 1 Tablespoon fresh lemon juice, one additional peeled, seeded, chopped cucumber and 1 cup of heavy cream.  Adjust salt and pepper to taste.  Put back in fridge until ready to serve.   Serve in chilled bowls and garnish with minced dill or mint.

For the Salad Nicoise

These are the basic ingredients.  You will need to adjust the portions for the number of servings you need.

Small baby potatoes

cucumber soup and salad nicoise 003

Simmer potatoes until just done.  Cool immediately in a colander with a little ice.  Place in bowl, add a little of the salad dressing.  Chill thoroughly.

Hard-boiled eggs – quartered and chilled

Tomatoes – quartered and chilled

Green beans – cooked and chilled

Sauté until just done, cool down immediately in ice water, drain, place in bowl and add a little dressing.  Chill well.  (I cook green beans as follows:  heat a little olive oil in a skillet.  Sauté about 5 minutes.  Add 1/2-3/4 cup of dry vermouth, reduce heat, cover and steam until done.  Season with salt and pepper.  I also add dice onion in the first step, if having the beans on their own.)  Your eyes are not deceiving you….those are purple beans.  They turn green when they cook.  My grandpa always grew that variety and I continue to do so today!  We threw in a few wax beans as that is what was ready to pick.

cucumber soup and salad nicoise 005 cucumber soup and salad nicoise 052

Nicoise olives

Red onion, sliced into 1/4 round slices

Cold, grilled or poached salmon (or, traditionally, canned tuna packed in oil)

We always grill the salmon on foil coated with a little olive oil.  Dave is really picky about the pin bones.  I use a pair of very sharp tweezers to remove them.

 cucumber soup and salad nicoise 022.2cucumber soup and salad nicoise 018.2

Capers for garnish (optional)

Anchovies for garnish (optional)

For the dressing

1 cup fresh, fruity olive oil

1/3 cup red wine vinegar

1/4 cup lemon juice

1 clove finely minced garlic

1 Teaspoon dijon mustard

Salt and pepper

Whisk all together in measuring cup or glass jar.

Assembling the Salad

Bring all your ingredients together.  Make sure your bowl and plates are cold.  Start with a base of lettuce.  We are using romaine from the garden.  Place all ingredients in sections around serving bowl.  You can also plate individually, using the same approach.  When finished, drizzle with a little dressing, garish with capers and anchovies if desired.

cucumber soup and salad nicoise 151.2  cucumber soup and salad nicoise 162.2

cucumber soup and salad nicoise 208.2

Filed Under: French, Quick - Week Night, Salads, Soup Tagged With: salmon

Mole Sauce…A Three Day Adventure!

07/08/2013 by Laura Leave a Comment

The Mexican grocer was my 4th stop in search of the chilies I needed for my Mole recipe.  By the time I arrived there, I had already purchased the other 24 ingredients.  The shop owner told me “I have a paste, you just add broth.  It’s made in Mexico and it is really good”.   I replied “I really like to cook, so I want to make it from scratch”.  On the third day of my adventure in Mole Sauce, those words from the kind man, kept repeating in my head.   Day 1, source and purchase the ingredients.  Day 2 prepare the Mole and simmer, simmer, simmer.  Day 3, cook the chicken and make the enchiladas!  Ole!

MOLE AND MARRYMOORE 163.1

I’ve made Mole 4 or 5 times.  It is one of my husbands favorites.  I adapted my recipe from the book, The Taste of Mexico.  I follow the recipe closely, with one or two time saving steps and ingredient changes.  I use high heat safflower oil, instead of lard.  I roast the chilies all at once in a large pan in the oven.  I use store-bought chicken stock.  This is a “go big or go home” recipe, that makes about a year’s worth of sauce.  I freeze it in quart jars for future enchiladas and tamales.

 MOLE AND MARRYMOORE 174 MOLE AND MARRYMOORE 172

     Ingredients
2 – 3 cups of lard, or oil

5 large white onions

14 cloves plus one head of garlic

3 tomatoes

10 tomatillos

3/4 cup raw pumpkin seeds

3/4 cup raw sesame seeds

3/4 cup raw peanuts

3/4 cup raw almonds

3/4 cup raisins

1 cup pitted prunes

2 small plantains peeled and sliced into 1/4 inch slices

1 teaspoon coriander seed

1 teaspoon anise

2 cinnamon sticks

1 stale croissant

2 charred tortillas

4 quarts chicken stock

30 chiles mulatos

16 chiles anchos

6 chiles pasillas

2 chiles chipotle

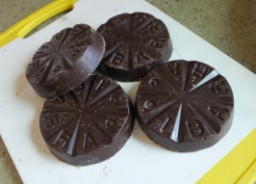
8 ounces Mexican chocolate tablets with cinnamon

1/4 cup sugar

Step One

Remove the husks and wash the tomatillos.  Place on roasting pan with tomatoes, one head of garlic, and one onion.  Roast at 375′ for approximately 20 minutes.  Cool and chop onion coarsely.  Squeeze garlic out of skin.  Set aside.

MOLE AND MARRYMOORE 197MOLE AND MARRYMOORE 242

Char the tortillas in a dry skillet.  Set aside.

Step Two

Prepare the chiles.  Wash chiles well to remove dust and dirt.  Remove stems and seeds.  Place on large baking sheet.  Spray with oil.  Roast chiles until softened, about 15 minutes at 375′.  Remove chiles from baking pan, place in large bowl, cover with water and soak at least 20 minutes.  Do not drain, leave in bowl until ready to use.

MOLE AND MARRYMOORE 189  MOLE AND MARRYMOORE 204  MOLE AND MARRYMOORE 223

Step Three

Saute 2 1/2 chopped onions in about 1/4 cup of oil in large, heavy pot.  Cook until softened and translucent.  Add 8 garlic cloves and sauté a couple more minutes.  Add roasted vegetables and cook until combined, about 5 minutes.  Remove to bowl and set aside.  Return pot to stove.

MOLE AND MARRYMOORE 235  MOLE AND MARRYMOORE 249

Step Four

Add enough oil to coat bottom of pot.  Heat over low heat.  Add sesame seed, pumpkin seed, almonds and peanuts.  Sauté about 5 minutes, stirring constantly.  Add raisins, prunes, plantains, coriander seed, anise and cinnamon.  Continue to stir and sauté about 5 more minutes.  Add torn tortilla and croissant.  Mix well.  Remove from heat and add ingredients to bowl with onions, tomatoes, tomatillos and garlic.

MOLE AND MARRYMOORE 269  MOLE AND MARRYMOORE 277.2

Step Five

Heat a quart of chicken stock on stove or in microwave.  Set up your blender.  Add the spice mixture to the blender with enough chicken stock to ensure mixture will blend smoothly.  Blend long enough to ensure all seeds are broken down.  You will need to do this in batches.  Add a little oil to the bottom of the cooking pot and place on very low heat.  Pour each batch back into the cooking pot.

MOLE AND MARRYMOORE 293.2 MOLE AND MARRYMOORE 292

MOLE AND MARRYMOORE 307Simmer on very low heat for about an hour.  Stir frequently to avoid burning.  Meanwhile, prepare the chiles.

Step Six

Chop 1 1/2 onions and 6 cloves of garlic.  Place the chiles in the blender in batches adding equal amounts of onion and garlic to each batch and adding soaking liquid from the chiles, to blend smoothly.  Pour the mixture into a strainer set over a bowl.  Repeat this process until all chiles are blended.  “Force” the mixture through the strainer with a spoon.

MOLE AND MARRYMOORE 314.2 MOLE AND MARRYMOORE 328.2

Add the chiles to the spice mixture in small batches, allowing about 10 minutes between each addition.

MOLE AND MARRYMOORE 340 MOLE AND MARRYMOORE 365

Coarsely chop the chocolate tablets add to the Mole with the 1/4 cup of sugar.  Simmer on very low heat 4 – 6 hours.  Since we finished this late in the day, we actually simmered the sauce overnight.

MOLE AND MARRYMOORE 373 MOLE AND MARRYMOORE 383

Day 3 – Make the Enchiladas!

You can use any kind of filling you choose.  We like chicken with Mole sauce.  I boiled a chicken, cooled it and removed the meat from the bones.  I added a chopped onion and enough Mole sauce to hold the mixture together.  Place a few spoonful’s of meat on each tortilla and roll up.  Place seam side down in oiled baking dish.

 mole enchiladas 003mole enchiladas 010

mole enchiladas 017 mole enchiladas 023

Cover the enchiladas with additional Mole.  Cover the pan with foil and bake at 375′ for about 40 minutes.  Add Queso Fresco and cilantro before serving.

We served this with homemade black beans and Mexican red rice, and one very large margarita!

mole enchiladas 026.1

The History of Mole*

Most people associate mole with either with Puebla or Oaxaca , but the origin of mole poblano, the thick, rich, chocolate-tinged sauce made so famous in the colonial mountain city of Puebla, Mexico, is still disputed, and generally involves these two versions of the legend:

The first says that 16th Century nuns from the Convent of Santa Rosa in Puebla de los Angeles, upon learning that the Archbishop was coming for a visit, went into a panic because they had nothing to serve him. The nuns started praying desperately and an angel came to inspire them. They began chopping and grinding and roasting, mixing different types of chiles together with spices, day-old bread, nuts, a little chocolate and approximately 20 other ingredients.

This concoction boiled for hours and was reduced to the thick, sweet, rich and fragrant mole sauce we know today. To serve in the mole, they killed the only meat they had, an old turkey, and the strange sauce was poured over it. The archbishop was more than happy with his banquet and the nuns saved face. Little did they know they were creating the Mexican National dish for holidays and feasts, and that today, millions of people worldwide have at least heard of mole poblano.


The other legend states that mole came from pre-Hispanic times and that Aztec king, Moctezuma, thinking the conquistadors were gods, served mole to Cortez at a banquet to receive them. This story probably gained credibility because the word mole comes from the Nahuatl word “milli” which means sauce or “concoction”. Another connection could be that chocolate was widely used in pre-Columbian Mexico, so people jumped to that conclusion.


Diana Kennedy, the famous cookbook author and television chef, adds a third, less plausible version in her book The Cuisines of Mexico, [Harper & Row:New York] 1972, (p.199-200), “This time it was Fray Pascual who was preparing the banquet at the convent where he (the archbishop) was going to eat. Turkeys were cooking in cazuelas on the fire; as Fray Pascual, scolding his assistants for their untidiness, gathered up al the spices they had been using, and putting them together on a tray, a sudden gust of wind swept across the kitchen and they spilled over the cazuelas.” Thus mixing together such an unheard-of combination of ingredients.

*From MexOnLine.com

http://www.mexonline.com/molepoblano.htm

Filed Under: Mexican Tagged With: chiles, mole, poblano, tomatillos

Laura’s “Somewhat” Traditional Spanakopita and Greek Salad

06/22/2013 by Laura 1 Comment

I cook for a lot of reasons; sustenance of course, stress reduction at the end of a trying day,  to share a meal with friends,  but also for the sheer challenge of re-creating a great restaurant meal using previously untried ingredients or techniques.

I don’t remember my first taste of Greek food.  It might have been the little restaurant on the corner in my old neighborhood, Byzantion, or a sample at one of the hundreds of food related trade shows I have attended.  The use of many of my favorite ingredients and flavors, draw me to these recipes frequently.  Oregano, lemon, olive oil, feta, mint, all at their peak of freshness…what’s not to love!  My dishes are based on traditional recipes mostly found in the fabulous “bible of authentic Greek cooking” Vefa’s Kitchen.  I add and subtract ingredients based on what needs to be cooked from the garden, the pantry or the fridge.   The abundance of spinach and kale from the garden are the inspiration for the Spanakopita, which is typically made with only spinach.

Laura’s “Somewhat” Traditional Spanakopita
6.21.13 286.1

1-2 large bunches kale, stems removed and sliced into bite size pieces

6.21.13 013 6.21.13 011

1-2 large bunches baby spinach, washed well, drained, tough stems removed

(The “greens for sauté” mix from Trader Joe’s is awesome for this, if you don’t have a garden.  You will need two bags)

12-14 large green onions, thinly sliced – both whites and tops

1/2 cup coarsely chopped parsley

3-4 eggs

8-24 ounces of feta cheese, coarsely chopped (Mt. Viko’s is my preferred feta)

1-2 teaspoons minced, fresh dill

salt and pepper to taste (remember the feta is a little salty by nature)

1 package phyllo dough, brought to room temperature

olive oil for sautéing and coating the pan

olive oil spray for assembly

9 x 13 baking dish

Sauté the kale in batches,  in a large skillet coated with olive oil over medium heat.  You do not need to cook through, just soften it.  Remove the kale to a colander.

6.21.13 015

Next sauté the spinach, again it does not need to cook all the way through, remove to the colander.  Now sauté the green onion and parsley for 1 -2 minutes.  Add the greens back to the pan and continue to cook over low heat about 10 more minutes.   Place all greens in a bowl and cool.  You want to make sure this is cool enough to not cook the eggs that you will add in the next step.  You can chill this overnight in the fridge.

6.21.13 0306.21.13 034

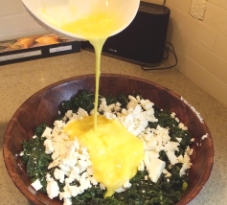
Add 2/3 of the feta to the greens.  Break the 3 eggs into a separate bowl whisk thoroughly.  Add the eggs to the greens and cheese mixture.  Season with salt and pepper.  Mix well.  Because the water content varies in greens and affects the total volume here, you will need to determine if you need one more egg and a little more cheese.  You want everything evenly distributed and well coated.

6.21.13 0916.21.13 109

This is where is gets pretty non-traditional….Did you notice I have not told you to melt any butter, in spite of working with phyllo dough?  Unless I am making something sweet with phyllo, I use olive oil spray.  Both for the ease in application and to cut the calories a bit.

6.21.13 112.1

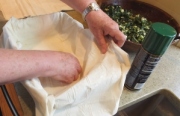
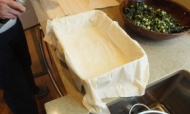
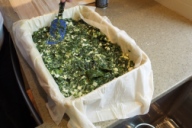
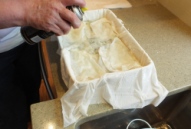
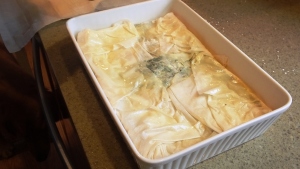
Coat the bottom of the baking dish evenly with olive oil.  Unroll the phyllo.  Layer single sheets into the baking dish as shown.  Spray between each layer with olive oil.  I used about 8 sheets in total to line the pan.  Pour the filling into the dough lined baking dish.  Gently pull the sides and ends in over the filling.  Remember to spray oil between the layers of dough.  To pretty it up a bit, I added one more sheet over the top of the pan, folded in half and sprayed with oil in between.  (I have made this recipe into  little “triangle pillows” for appetizers, as well as individual servings in muffin cups.  Experiment, have fun, make it your own!)

6.21.13 125 6.21.13 1296.21.13 139

6.21.13 1606.21.13 162.16.21.13 176

   6.21.13 184.1

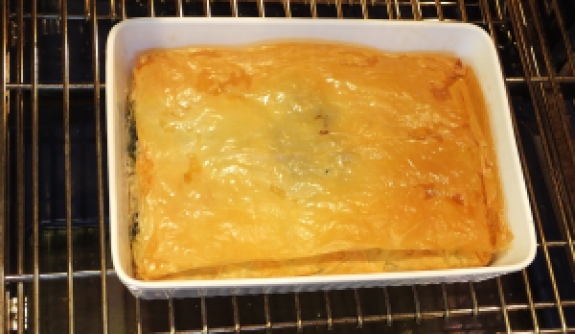
Preheat the oven to 375′ and bake 45-50 minutes until lightly browned and internal temperature reaches 170′.  Let rest at least 15 minutes before cutting into squares for serving.  This is wonderful both hot and at room temperature.

Laura’s Greek Inspired Salad

6.21.13 071.1

I don’t think there is ever a time when a Greek salad does not taste wonderful.  In keeping with today’s theme, you knew it was coming, didn’t you?  The veggies aren’t from the garden, but this is something we make many times over throughout the summer.

1 English or 3-4 Persian cucumbers, peeled (or not) coarsely chopped

1 red bell pepper, coarsely chopped (if your prefer green, that is fine!)

1 red onion, coarsely chopped

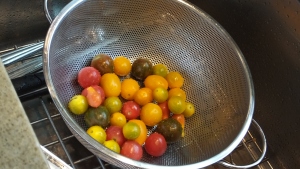
12-15 cherry tomatoes, sliced in half

6.21.13 065

6-8 ounces large, pitted and well drained kalamata olives

8 ounces chopped feta cheese

Juice of 2 lemons

Extra Virgin Olive Oil

chopped fresh dill, about 1 tablespoon

salt and pepper

Place all the veggies, cheese and olives in a bowl as shown.  I like to serve it  “deconstructed” as not everyone likes olives or tomatoes etc….

Juice the lemons.  The ratio for the dressing is 2 to 1, olive oil to lemon juice (or, if you prefer, red wine vinegar).  Add the appropriate amount of olive oil to the lemon juice and whisk.  Add salt and pepper to taste as well as the minced dill. (Or basil or oregano or mint or whatever combo suits your taste.)  Pour the dressing over the salad and chill for 2-3 hours.  Serve on a romaine leaf with a little dressing from the bottom of the bowl, drizzled on top.

I bet you think I am done now….not just yet!  I had a couple of chicken breasts I needed to cook up, so in keeping with today’s theme, I decided to make a one of my favorite chicken soups, Avgolemono.  There have been many times when I have had a cold or the flu and my husband has  ran to a Greek restaurant to get it for me!  As with any cultures version of “chicken soup”  there are hundreds of variations.  I break with tradition by adding finely diced celery and carrot , as well as fairly good size chunks of chicken, to my recipe.  I have had the soup many times with only broth and rice.  No matter what is left out or added in, it should always be smooth, velvety, creamy and lemony.

6.21.13 302.1

Avgolemono Soup – Laura’s Way

2-3 cups chopped, cooked chicken

2 quarts, total, chicken stock (may need more for adjusting thickness of soup)

2-3 carrots, peeled

2-3 stalks of celery, peeled

4-6 eggs

juice of 3-5 lemons

1 cup of Arborio rice

You can make this soup with prepared stock, rotisserie chicken, or start all the way from scratch by boiling and deboning a whole chicken.  You can also make this soup vegetarian by using vege broth and eliminating the chicken.  My recipe today is based on a finished  total of 2 quarts of stock.  I started with 2 bone in, skin on chicken breasts, one quart of stock, minced onion , a price of carrot and a piece of celery.  Simmer all gently until the chicken is cooked.  Cool, remove chicken from bone, chop into small chunks and set aside.  Strain broth and place back on a slow simmer.

6.21.13 003.1

Chop 3 stalks of celery and 2-3 carrots into small uniform dice.  Add to the gently simmering stock.

6.21.13 042.1

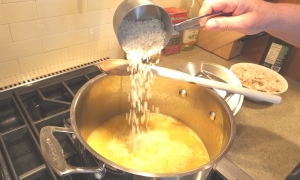
Cook for about 10 minutes.  Bring broth to a strong rolling bow.  Add 1 cup of rice, reduce heat and simmer, covered for 20 minutes.  Add the chicken back to the pot.

6.21.13 211

While rice is cooking prepare egg and lemon thickening.  In a small blender whisk together 5 Tablespoons fresh squeezed lemon juice and 4 eggs, until very light and fluffy.

6.21.13 232.1

Place into a large bowl.  Temper the eggs by adding a few ladles of hot broth into the bowl.  Once tempered add all back into the pot.  Keep on very low heat.

6.21.13 256.1

6.21.13 262.1

I had to make two adjustments for our taste.  I did not think the soup was as rich, creamy or lemony as usual.  To correct this, I blended 2 egg yolks with 5 more tablespoons fresh squeezed lemon juice.   I tempered the mixture and added back into the pot.  It was exactly the fix needed.  After a few more minutes on the stove – the soup was far thicker then we like, so I added about 1 additional cup of chicken stock.  With a few extra dashes of salt and pepper – our soup was perfect.

This was a wonderful first day of summer meal that left us with lots of options for a few lunches!

6.21.13 300.1

Thanks to Dave for learning to use all the different settings on the new camera!  I believe I see improvements!

Filed Under: Salads, Soup Tagged With: chicken, cucumber, feta, kalamata olive, kale, lemon, spinach

Farming in the City….3 Weeks Later

05/31/2013 by Laura Leave a Comment

…UPDATE ON THE CROPS

After a few recording breaking warm days and 3 weeks of alternating rain and sun, rain and sun….things are really growing.   Hopefully you can  tell we have a new camera.  We are still learning how to use it.  We purchased a Fugi HS50 EXR.  It is pretty “dummy proof” on the auto settings!

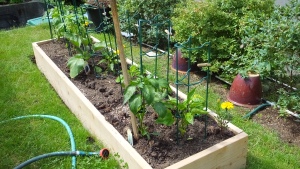
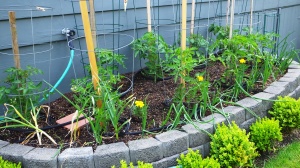
The early crops are in the raised bed shown here.  Kale, spinach, radishes, leeks, arugula, beets and snow peas.  Mixed in with those are a cucumber, zucchini, yellow crook neck squash and patty pan summer squash.  I am growing these upward, in the cages.  There will be plenty of room for them when the early crops have been harvested.

DSCF0141

Dave built  a new raised bed for this year.  We are calling it the “Salsa Garden”.  So far it contains Poblano Pepper, Eggplant, Anaheim Chiles, Jalapeno Pepper, Tomatillos and a bell pepper.  I will add cilantro soon.  To the right of this garden are the blueberry bushes.  They are about 8 years old now and are absolutely loaded with baby berries.  Pie, jam, chutney are forthcoming!

DSCF0144

We also have raspberries and June bearing strawberries.  Dave just finished reinforcing the raspberry trellis.  The yellow raspberries are amazing.  We added two NW grape plants, which will eventually cover the top trellis.

DSCF0148.1

DSCF0147.1

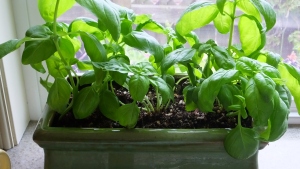
Below is the tomato bed.  There are also Walla Walla sweet onions here, and will eventually house the basil plants that are currently safe and sound on the kitchen window sill.  There are 9 tomato plants, 8 varieties.  Green Zebra (our favorite), Mr. Stripey, Black Krim, Juane Flamme, Sweet Baby Girl, Gold Nugget, Brandywine, and San Marzano.  They are loaded with blossoms!

DSCF0145.1

DSCF0126

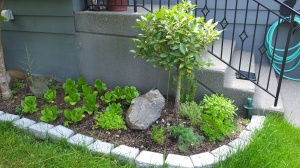
The herb garden and the romaine lettuce are doing fantastic!

DSCF0142

The bed below has a few rows of green beans and a couple more squash plants.

DSCF0143

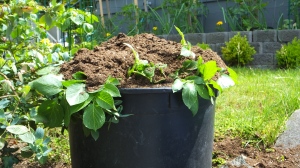
Dave is growing his “prize winning” potatoes in a big tub this year.  They will be converted to potato salad on the 4th of July!

DSCF0149

Filed Under: Gardening

Copper River Salmon

05/30/2013 by Laura Leave a Comment

It’s here….it is finally here!  The irresistible Copper River Salmon.  If you don’t know about this fish, or have not tried it….you must.  The Copper River flows in the state of Alaska. Almost 300 miles in length, this wild rushing river empties into Prince William Sound at the town of Cordova. Salmon that originate in these pristine waters are challenged by the river’s length and its strong, chill rapids. Consequently, Copper River salmon are strong, robust creatures with a healthy store of natural oils and body fat. These qualities make the salmon among the richest, tastiest fish in the world. Fortunately, fatty Copper River salmon is good for you, as it is loaded with Omega-3 oils.

copper river 065.1

We simply grill this fish with a little sea salt and pepper.  The fish will take approximately 12-14 minutes on the grill. (This was a 1.5 pound filet.)  It is important to not overcook the fish, and to remember that it will cook a tiny bit more after pulled off the heat.  I place the fish on foil lightly sprayed with olive oil, and then place on the grill. I test the fish by piercing it with a fork in the thickest part, to check the color and texture.

copper river 149.1

We love to grill veggies at our house.  In a couple of months – hopefully – we can get the zucchini, squash, onions and peppers from the garden!  I cut the veggies in fairly thick slices,  spray with olive oil and season with salt and pepper.  Cook the veggies on a hot grill to “mark”, about 5 minutes per side.  They will continue to cook once removed from the grill.  Pull them while they are still crisp to avoid “mushy” veggies.  Sprinkle a little balsamic vinegar or olive oil and lemon juice over the veggies before serving.

copper river 094.1

copper river 123.1

A delicious, seasonal meal!  Enjoy at least once this season.

Filed Under: Fish and Seafood Tagged With: grilled veggies, salmon

Farming in the City – The Crops are In!

05/09/2013 by Laura Leave a Comment

Finally… warm weather and (hopefully) no further chance of frost!  You may have noticed the recipe posts have slowed a bit.  We have been busy getting the garden beds ready for this years crops.   I have what I refer to as “A City Farm”.  I don’t have one large bed, like most folks.  I have a lot of little beds where I sneak edibles in with the landscape wherever I can.  Due to the Western exposure, these beds are all in the front yard.

The early crops are in the raised bed shown here.  Kale, spinach, radishes, leeks, arugula, beets and snow peas.  Mixed in with those just this weekend are a cucumber, zucchini, yellow crook neck squash and patty pan summer squash.  I am growing these upward, in the cages.  There will be plenty of room for them when the early crops have been harvested.

garden 001

garden 044Dave built  a new raised bed for this year.  We are calling it the “Salsa Garden”.  So far it contains Anaheim Chiles, Jalapeno Pepper, Tomatillos and a bell pepper.  I will add cilantro soon.  To the right of this garden are the blueberry bushes.  They are about 8 years old now and are absolutely loaded with baby berries.  Pie, jam, chutney are forthcoming!

garden 004

garden 030

We also have raspberries and June bearing strawberries.  Dave just finished reinforcing the raspberry trellis.  The yellow raspberries are amazing.

garden 005

Under the front window is the tomato bed.  There are also Walla Walla sweet onions here, and will eventually house the basil plants that are currently safe and sound on the kitchen window sill.  There are 9 tomato plants, 8 varieties.  Green Zebra (our favorite), Mr. Stripey, Black Krim, Juane Flamme, Sweet Baby Girl, Gold Nugget, Brandywine, and San Marzano.

garden 003garden 037

With any luck, I will be able to make the heirloom tomato, watermelon, kalamata olive, cucumber, mint and feta salad, again this year for Andrea’s birthday in August!

???????????????????????????????

To the side of the front porch is the herb garden.  That is a bay leaf tree in the center and romaine lettuce toward the back.

garden 006

The bed below has a few rows of green beans and a couple more squash plants.

garden 002

My intention is to repost these same shots about every 4 weeks to show our (hopeful) progress.  I have a good feeling about this summer!

Filed Under: Gardening

Summer is Here…Potato Salad!

05/06/2013 by Laura Leave a Comment

Wow…80′ here in Seattle today.  What do we do when we get a glimpse of summer?  We barbecue chicken and make potato salad.   With the visit of my parents and the great weather, I knew it was potato salad time!  I have been making this recipe for years, and it is my favorite.  I think potato salad preferences are very personal and are likely based on what you grew up with.  My best friend makes her salad about the same way, only she adds pickles and pickle juice.  You can easily add any ingredients that make the salad your own!

???????????????????????????????

Ingredients

This makes a “party size” batch of salad.  You can cut the recipe in half if needed.

5 pounds small red potatoes

3/4 cup apple cider vinegar

10 eggs, hard-boiled

1 medium purple onion, diced

1 medium sweet onion, diced (Maui or Walla Walla)

1 bunch green onions, sliced, including tops

2 cups chopped celery

1/4 cup finely chopped parsley

2 Tablespoons celery seed

1 Tablespoon celery salt

1 Tablespoon kosher salt

1/2 tablespoon black pepper

2 cups mayonnaise, whatever kind you prefer

2 Tablespoons prepared yellow mustard

paprika for garnish

Scrub the potatoes and remove any blemishes.  I do not remove the peels.  Put them in a large pot of water and bring to a boil.  Simmer for about 20 minutes, until fork tender.  Drain the potatoes in a colander for about 15 minutes.  Place the potatoes in a non-reactive bowl.  Pour the apple cider vinegar over the potatoes, cover with plastic wrap and refrigerate overnight.

Cook the eggs at the same time.  Bring them to a boil, turn off heat, cover and let set for 10 minutes.  Rinse in cold water and refrigerate overnight.

???????????????????????????????

I always make the salad early, the morning I intend to serve it.  Chop the potatoes into bite size pieces.  There will be vinegar left on the bottom of the bowl.  Pour that over the chopped potatoes.

???????????????????????????????

Add the rest of the ingredients.  Gently mix all together.  Adjust for seasoning to your taste.  Pile into a serving bowl, sprinkle with paprika and chill at least 6 hours.

???????????????????????????????

Tender, Juicy Barbecued Chicken

After burning many pieces of chicken over the years, we finally got it right.  We turned down the heat and turned the chicken more frequently.  We also learned that it is easiest if all the pieces are the same size, like the chicken quarters below.

Heat grill to 350′.  Season the chicken with salt and pepper on both sides.  Cook the chicken a total of 40 minutes, or until temperature registers 165′ on a thermometer.   Turn the chicken every 10 minutes.  Baste with Chef Hak’s Chipotle Bourbon  BBQ sauce the last 10 minutes of cooking time!

potato salad 051

Be sure to try Chef Sharone Hackman’s Award winning BBQ Sauces.  Not heard of them?  Check it out here!

http://www.haksbbq.com/

chef hak2

Filed Under: Poultry Tagged With: potato, summer

French Inspired “Pork and Bean” Stew

04/29/2013 by Laura 2 Comments

???????????????????????????????

This one pot wonder is inspired by a post on the blog “Not Without Salt”, who was just named the Best Food Blog 2013 by Saveur Magazine!   The original version was created for a pressure cooker and featured in the new “Pressure Cooker Perfection”  cookbook from America’s Test Kitchen.  I have made this recipe twice now.  I fully intended to use my pressure cooker the first time I made this, but it was far too small for this recipe.  So I improvised.  The first time I used the crock pot and the second time I braised the stew in the oven about 5 hours.  I actually think the crock pot version was slightly better. Regardless, this is a fabulous “stew”, that not only fills your tummy at dinner time, it also fills your kitchen with the most amazing aromas as it cooks!

Ingredients

???????????????????????????????

8 ounces, 1 1/4 cups, dried cannellini beans, soaked overnight in water*

*You could use two cans of cannellini beans.  You would need to rinse them extremely well, and add the last hour of cooking.

3-4 pound boneless pork butt roast, cut into 1-2″ fat trimmed cubes and seasoned on both sides with salt and pepper

2 yellow onions, coarsely chopped

8 cloves garlic, minced

6-8 carrots cut into 2″ chinks

1 large fennel bulb cut into 1″ chunks

???????????????????????????????

2 Tablespoons Herbs de Provence

2 bay leaves

1/3 cup flour

1-2  cups dry white wine

2-3 cups chicken stock

high heat oil for browning

salt and pepper

Brown the pork in a skillet (if using the crock pot)  or Dutch oven (if braising in the oven)  in about 2 tablespoons of oil.  Brown in 2-3 batches, don’t crowd the pan. ???????????????????????????????

Once all the meat has been browned, drain the excess oil, leaving about 1 tablespoon in the pan.  Add the onions and saute about 3 minutes.  Add the garlic and saute about 5 more minutes.  Scrape up all the lovely bits from the bottom of the pan.???????????????????????????????

Sprinkle the 1/3 cup of flour over the onions and garlic.  Saute about 1 minute to cook in the flour.  Add the Herbs de Provence and the Bay leaves.

???????????????????????????????

Add in 1- 2 cups of wine.  Stir briskly, scraping the pan to incorporate all the “goodies” from the bottom of the pan.  Cook for about 10 minutes or until the liquid is reduced by half.

???????????????????????????????

Reduce the heat and add the ingredients back into to pan as listed below. (If using the crock pot, layer the ingredients as listed,  and then pour the onion, garlic and wine reduction over them.)

Add in the drained, soaked beans followed by the pork, the carrots and fennel.  (If using canned beans, do not add them yet!)  Add chicken broth to ensure all ingredients are covered. (If using canned beans, do use about 1-1 1/2 cups broth.) If using a Dutch oven, bring all to a simmer and then move to 325′ oven for about 5 hours, stirring every 45 minutes to an hour. (If using canned beans, cook 4 hours and then add the beans, cook one more hour.)  If using the crock pot, cook 6-7 hours.  Again, if using canned beans, add them in at the last hour of cooking time.

To serve, plate in a bowl and garnish with chopped parsley.  Serve with crusty french bread, a tossed green salad* and a Washington Pinot Grigio.

 ???????????????????????????????

*If I had skipped the salad, I would have skipped the trip to the ER to get stitches in my hand!  I was dishing things up at 7pm.  I went to open a bottle of salad dressing.  The bottle was broken, just under the cap. When I went to turn the cap, it fell off and the glass at the top of the bottle sliced my palm.  It was pretty deep and I knew I needed stitches.  So, everything got turned down to “warm” and we headed to the neighborhood ER.  3 stitches and only one hour later, we sat down to this lovely meal. The salad dressing bottle is below.  I am not going to show you the hand, or the stitches!

???????????????????????????????

Filed Under: One Pot Meal Tagged With: beans, fennel, pork

  • « Previous Page
  • 1
  • …
  • 11
  • 12
  • 13
  • 14
  • Next Page »

Stay in touch!

Enter your email address to subscribe to More Savory Less Sweet, and receive notifications of new posts by email.

Look here for specific recipes.

Copyright © 2025 · Lifestyle Pro Child Theme for More Savory, Less Sweet on Genesis Framework · WordPress · Log in